Key Takeaways
Engine trouble on the water can be stressful, but most common problems have surprisingly simple solutions. Understanding a few core systems is the key to diagnosing issues quickly and confidently. These takeaways provide the essential, actionable insights you need to troubleshoot like a pro and prevent breakdowns before they happen.
- Prioritize the fuel system when trouble starts, as it’s the number one cause of engine issues. Always carry spare fuel filters and know how to change them on the water to combat clogs and contamination.
- Solve overheating by checking water flow at your exhaust outlet; a lack of water almost always points to a failed impeller. Replace your impeller annually or every 200 hours to prevent this common failure.
- Check the basics first when your engine won’t start, as the problem is often a disconnected kill switch lanyard or the boat not being firmly in neutral.
- Master your battery connections to solve most electrical gremlins, as corrosion is a common power-killer. A healthy battery should read 12.6 volts or higher, and terminals must be clean and tight.
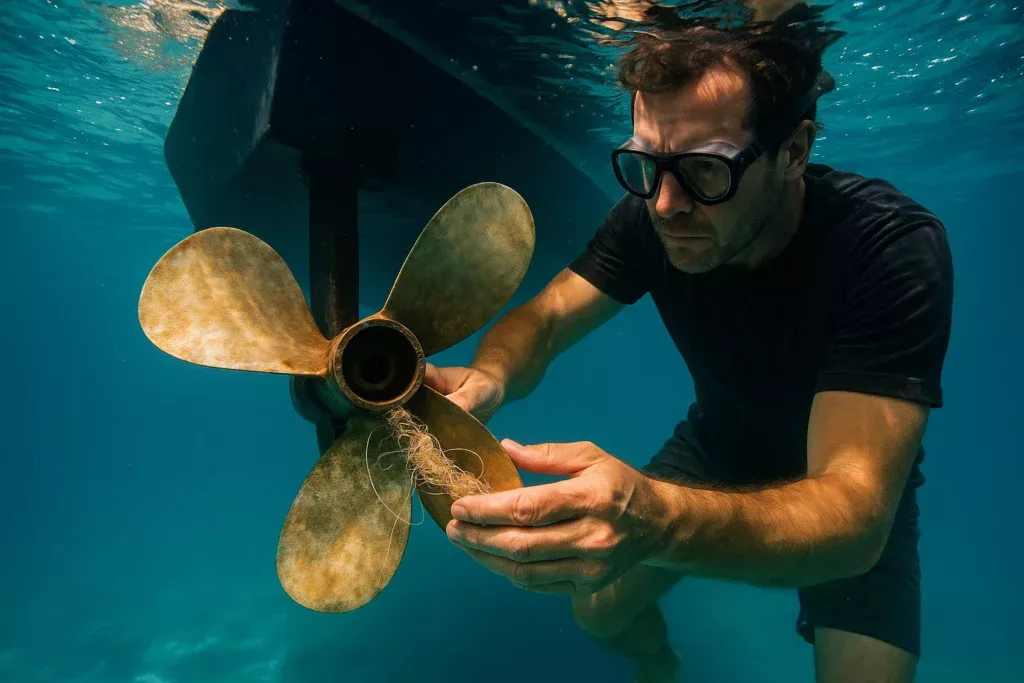
- Diagnose sudden vibration at the prop, as a new, intense shake is almost always caused by a fouled or damaged propeller. Immediately reduce speed and check for wrapped lines or impact damage.
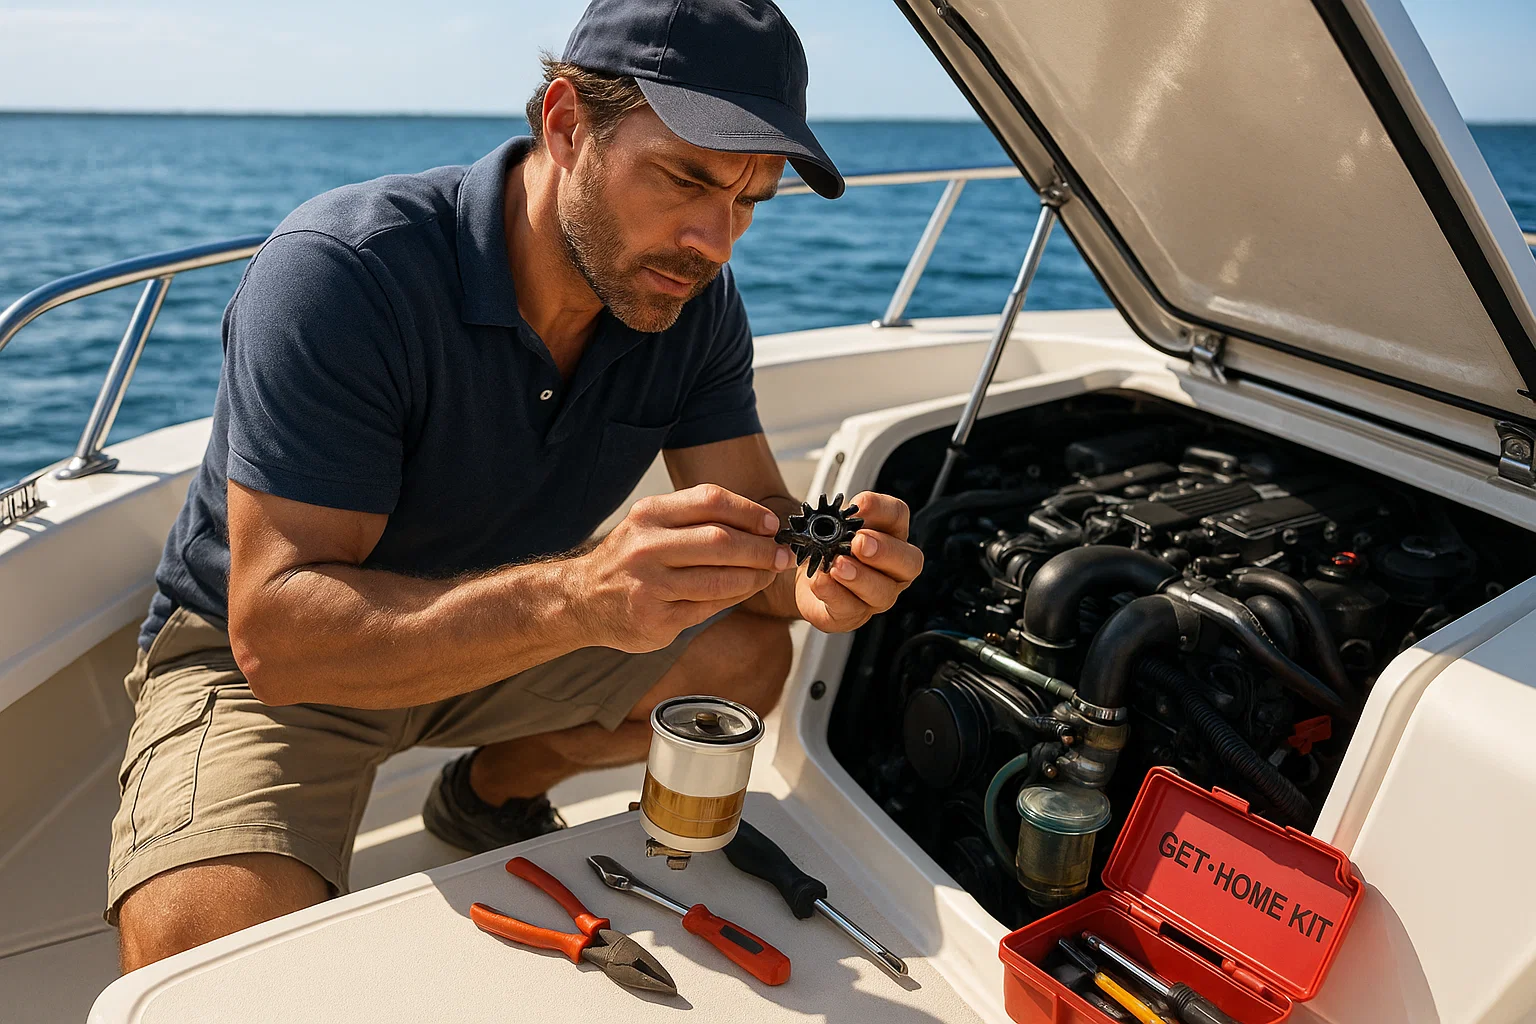
- Build your “get home” kit with critical spares to handle common issues on the spot. Your kit must include fuel filters, an impeller, and engine belts at a minimum.
- A 5-minute pre-departure check is your most powerful tool for reliability, catching over 90% of potential problems. Make inspecting fluids, the sea strainer, and seacocks a non-negotiable routine.
Mastering these fundamentals is the key to confident and stress-free boating; dive into the full guide for step-by-step instructions.
Introduction
You turn the key, and instead of the familiar roar of your marine engine, you hear a single, disappointing click. Or worse, absolute silence.
That sinking feeling is something every boat owner dreads. The good news? The vast majority of on-water breakdowns don’t require a master mechanic to solve. They stem from a handful of common, surprisingly simple issues that you can learn to diagnose and fix yourself.
Knowing how to handle these frequent failures is the difference between a ruined day and a quick, satisfying fix that gets you back underway. It’s about trading anxiety for confidence.
This guide is your practical roadmap. We’re not diving into complex engine rebuilds. Instead, we’re focusing on the real-world problems that cause over 90% of engine trouble on the water.
You’ll learn how to:
- Trace and solve the most common fuel system clogs and leaks.
- Quickly respond to an overheating alarm before it causes damage.
- Hunt down the simple electrical gremlins that prevent a start.
- Interpret strange vibrations and what they’re telling you.
- Build a simple maintenance routine that prevents these issues from happening in the first place.
Most engine problems begin with the basics. So let’s start with the number one reason a perfect day on the water gets cut short.
Decoding Fuel System Failures: The Most Common Culprit
Fuel-related issues are the number one reason a marine engine sputters, loses power, or refuses to start. When your engine acts up, your fuel system should be the first place you investigate.
Understanding the entire fuel journey—from the tank to the cylinders—is the key to a quick diagnosis and getting back underway.
The Telltale Signs: Sputters, Stalls, and Silence
An engine sputtering to life and then dying often points to fuel starvation, like a clog. An engine that won’t start at all could be a sign of severe contamination.
Picture this: Water enters your fuel tank through condensation or bad seals. This creates a perfect environment for microbial growth, the infamous “diesel bug,” which forms a thick sludge that clogs everything.
Your quick fix is to always carry extra fuel filters and a quality biocide treatment.
Your First Line of Defense: The Fuel Filter
The fuel filter is the most frequent point of failure in the entire system. It’s designed to trap debris, water, and sludge, so it’s the first component to get overwhelmed.
A visual inspection of the filter’s sediment bowl might reveal water or gunk. For a pro-level diagnosis, a vacuum gauge installed before the filter will clearly show a clog when under load.
Changing a filter is a critical skill for any boat owner:
- Shut off the fuel supply valve.
- Place a container or absorbent pad under the filter to catch any spills.
- Unscrew the filter housing and carefully remove the old element.
- Wipe the bowl clean and inspect the rubber O-rings or gaskets for damage.
- Install the new filter, making sure you get a good, hand-tight seal.
- Prime the system to bleed out any air before attempting to restart the engine.
The Invisible Enemy: Air Leaks and Vapor Lock
Air in your fuel lines is just as disruptive as a clog. It creates an “air lock” that the fuel pump can’t overcome, effectively starving the engine.
These leaks often hide in plain sight.
- Common Leak Points: Loose fittings, cracked or brittle fuel lines, a degraded primer bulb, or a blocked fuel tank vent.
To hunt down an air leak, listen for a “whoosh” sound when you open your fuel cap. That’s a telltale sign of a blocked tank vent, which creates a vacuum in your tank. You can often clear it with a piece of heavy monofilament line. Squeeze the primer bulb—if it doesn’t get firm, it’s likely faulty and needs replacing.
Solving an engine problem often starts with the fuel. By learning to spot contamination, change a filter, and trace an air leak, you can handle the most common cause of breakdowns on the water.

Keeping Your Cool: How to Prevent and Fix Engine Overheating
An overheating engine can lead to catastrophic failure if ignored. Your boat’s cooling system is its lifeline, and understanding how it works is non-negotiable for any owner.
Most issues stem from a lack of raw sea water getting through the system.
The Raw Water Journey
Picture the path water takes to cool your engine. It starts at the intake on the hull and flows through several key components before exiting through the exhaust.
Knowing these parts is the first step to a quick diagnosis:
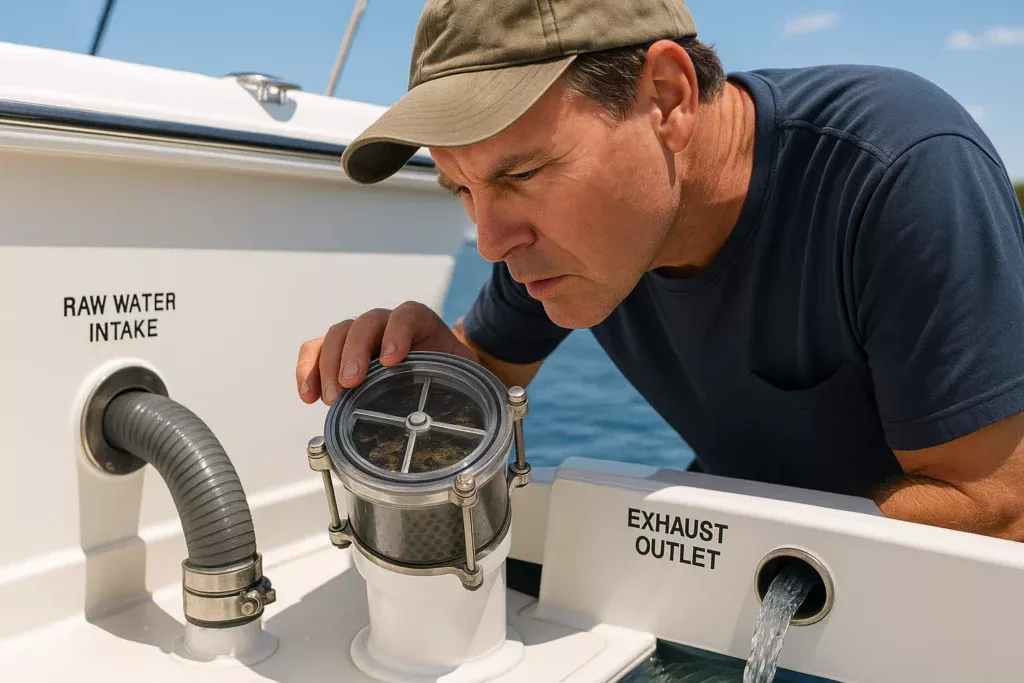
- Sea Strainer: A clear-lidded filter that catches seaweed and debris. This is your first line of defense.
- Impeller Pump: A rubber-vaned pump that acts as the heart of the system, pulling raw water in.
- Heat Exchanger: The engine’s “radiator,” where heat is transferred from the engine’s internal coolant to the raw sea water.
- Exhaust Elbow: Where cooling water is finally injected into hot exhaust gases to cool them before they exit the boat.
First Response to an Overheating Alarm
A high-temperature alarm or steam from the exhaust demands immediate action. Don’t push it.
Immediately reduce your throttle to idle. If it’s safe to do so, shut down the engine to prevent serious damage like a warped cylinder head.
Start your troubleshooting with a quick, three-step check:
- Check the Intake: Look over the side. Is a plastic bag or a clump of weeds wrapped around your raw water intake scoop?
- Inspect the Sea Strainer: This is a routine check you should do before every departure. Open the lid and clear out any debris.
- Confirm Water Flow: Look at your exhaust outlet. If you don’t see a steady stream of water spitting out, you have a critical problem. No water flow almost always means a blockage or a failed impeller.
The Most Common Failure: The Impeller
The rubber impeller is a wear item designed to fail before more expensive parts do. It should be replaced annually or every 200 hours, whichever comes first.
A failed impeller doesn’t just stop pumping; it self-destructs, sending rubber vanes into the cooling system where they can create blockages. If you find your impeller is missing vanes, you must account for every piece by checking the passages of your heat exchanger. Always carry a spare.
Blockages in the heat exchanger or a corroded exhaust elbow are also common culprits if the impeller is intact but the engine still runs hot.
Most overheating issues begin with a simple lack of water flow. Regularly checking your sea strainer and replacing your impeller on a strict schedule is the best and cheapest insurance you can buy against a day-ending breakdown on the water.
The Spark of Life: Solving Electrical and Starting Problems
You turn the key, and… nothing. Or maybe just a single, hollow click. That dead silence is a universal feeling for boat owners.
Electrical gremlins are frustrating, but most starting issues can be traced back to a few simple, common culprits.
First, Check the Obvious
This is when you get no response or just a single “clunk” from the engine when turning the key. Before you diagnose a major problem, diagnose your process.
Run through these three operator errors first:
- Kill Switch (ECOS): Is the emergency cut-off switch lanyard properly attached? This is the number one reason for a no-start condition.
- Gear Shift: Is the transmission firmly in neutral? Every engine has a neutral safety switch that prevents it from starting in gear.
- Battery Switch: Is the main battery selector switch turned to “On” or “Both”?
Battery Health and Connections
The harsh marine environment is brutal on electrical connections. Corrosion is your silent enemy, creating resistance that chokes the flow of power.
Use a multimeter to check your battery voltage. A healthy, fully charged battery should read 12.6 volts or higher. Anything below 12.2V means it’s significantly discharged and needs attention.
The quickest fix is often the simplest: disconnect the battery and clean the terminals and cable ends with a wire brush until they shine. A loose or corroded connection can stop a brand-new battery from delivering its power.
Engine Cranks but Won’t Fire
If the engine is turning over but not actually starting, that’s good news. It confirms your starting circuit and battery are likely working. The problem lies elsewhere.
Follow this troubleshooting path:
- Go Back to Fuel: Is the primer bulb firm? Can you see fuel in the filter? This is the most common cause.
- Check for Spark (Gasoline): Use an inexpensive spark tester to confirm your ignition system is firing. No spark could mean a bad coil or module.
- Check the Stop Solenoid (Diesel): Make sure the solenoid is engaging correctly to allow fuel to reach the injectors.
Most starting issues are simple and begin with the operator or a bad connection. Always check the kill switch, neutral gear, and battery terminals before assuming a more complex failure.
Shakes, Rattles, and Groans: Addressing Mechanical Problems
Mechanical issues often announce themselves with new noises or vibrations. Your boat is constantly talking to you—learning to interpret these physical cues can help you catch a problem before it becomes a major failure.
Picture this: you’re cruising on a perfect day, and a new, jarring vibration starts shaking the deck. Don’t ignore it.
The #1 Cause of Sudden Vibration: Your Propeller
A sudden, intense vibration that changes with your RPMs almost always points to an issue at the back of the boat. Immediately reduce speed and investigate.
This is typically caused by something interfering with the propeller. Common culprits include:
- A wrapped rope or thick fishing line
- A snagged plastic bag or trash
- A bent or chipped blade from hitting a submerged object
A fouled prop can often be cleared by shutting down the engine and removing the debris. However, a bent or damaged propeller causes severe vibration and requires a haul-out for professional repair or replacement.
That Clunking Sound: Checking Engine Mounts
If you hear a distinct “clunk” when shifting into gear or notice excessive engine movement, your mounts could be the problem. Engine mounts are the heavy-duty rubber blocks that absorb engine vibration and hold it in place.
You can diagnose this with the engine off. Look for these signs:
- Excessive Movement: Try to physically rock the engine. If it moves easily, the mounts are likely worn.
- Visible Wear: Look for cracks in the rubber or rust trails originating from the mount bolts, indicating failure.
Replacing engine mounts is a significant job. It often involves lifting the engine and requires a professional shaft realignment to prevent further damage to your drivetrain.
Drivetrain and Gearbox Health Check
Less common but critical issues can arise in your transmission and drivetrain. Difficulty shifting or strange noises that aren’t tied to the prop should prompt a closer look.
Start with these two simple checks:
- Check the Gearbox Fluid: Look at the level and condition. Milky fluid indicates water intrusion, a serious issue that needs immediate attention to prevent gearbox failure.
- Inspect the Shaft Coupling: This connects your transmission to the prop shaft. Ensure all bolts are tight and properly secured. A loose coupling is a major source of noise and vibration.
Learning to recognize the difference between a fouled prop and a loose mount is a key skill. Paying attention to these shakes and rattles allows you to address small issues before they leave you stranded.

Proactive Ownership: A Maintenance Strategy to Prevent Breakdowns
The best way to fix a marine engine problem is to prevent it from ever happening.
A consistent, proactive maintenance routine will save you money, time, and the stress of being stranded on the water. It’s the single most important factor in your boat’s reliability.
Building Your Essential Onboard Toolkit & Spares
Don’t leave the dock without a basic toolkit and a well-stocked box of critical spares. Think of it as your first line of defense against common failures.
Your “get home” kit should always include:
- Multiple Fuel Filters: Both primary (water-separating) and secondary (engine-mounted).
- Impeller Kit: The correct impeller for your engine, plus the necessary gaskets or O-rings.
- Engine Belts: Spares for the alternator and any raw water pump belts.
- Hose Clamps: An assortment of high-quality stainless steel clamps.
- Fuses & Electrical Connectors: A variety pack to match your boat’s systems.
- Engine Oil and Coolant: At least enough for a complete top-off.
The Power of the Pre-Departure Checklist
A simple, laminated checklist is your most powerful tool. This quick inspection before every single trip can feel repetitive, but it’s how you spot trouble before it starts.
This five-minute check can catch over 90% of potential issues that lead to breakdowns:
- Visual Engine Inspection: Look for any new leaks (oil, fuel, coolant), loose belts, or frayed wires.
- Check Fluid Levels: Engine oil, coolant, and transmission fluid.
- Open Seacocks: Confirm the raw water intake seacock is open.
- Clean the Sea Strainer: A quick glance to ensure it’s free of seaweed or debris.
- Turn on Battery Switch: Confirm your battery voltage is healthy (above 12.6V) before you turn the key.
Keeping a Meticulous Maintenance Log
A detailed log is your engine’s health history. It’s invaluable for troubleshooting developing issues and adds significant value when you eventually sell the boat.
Record these key details after any work is done:
- Date and Engine Hours: The two most important data points for tracking service intervals.
- Service Performed: Be specific (e.g., “Replaced primary fuel filter, Racor S3201P”).
- Parts Used: Include part numbers for easy reordering in the future.
- Observations: Note any unusual performance, noises, or changes. This helps you connect the dots on future problems.
Reliability on the water isn’t about being a master mechanic—it’s about being a diligent owner. A few minutes of prevention on the dock is worth hours of frustration and troubleshooting offshore.
Conclusion
Understanding your marine engine isn’t about becoming a master mechanic overnight. It’s about building the confidence to know exactly where to look first when something goes wrong.
This knowledge transforms you from a worried passenger into a capable captain, ready to turn a potential crisis into a manageable fix.
Here are the key principles to remember:
- Fuel is Your First Suspect: When an engine sputters or stalls, always start by investigating the fuel system—filters, air leaks, and contamination are the most common culprits.
- Water Flow is Life: A lack of water spitting from your exhaust demands immediate attention. This almost always points to a blocked intake, a clogged sea strainer, or a failed impeller.
- Check the Simple Things First: Before assuming a major electrical failure, always confirm the kill switch, neutral gear, and battery connections are secure.
- Listen to Your Boat: New vibrations or sounds are your engine’s way of talking. A fouled prop or a worn engine mount often announces itself long before it becomes a critical failure.
Your journey to self-sufficiency on the water starts now. This weekend, take the first step by assembling your “get-home” kit. Stock up on spare filters, an impeller, and belts. Then, create and laminate a pre-departure checklist to keep at the helm.
Reliability isn’t a matter of luck; it’s the direct result of proactive ownership.
Empower yourself with these skills, and you’ll spend less time troubleshooting at sea and more time enjoying the destination.


Leave a Reply