
IBoat Radio Repair: 15 Years of Fixing Static, Silence, and Everything In Between
I’ve been fixing boat radios in South Florida for 15 years, from Miami’s bustling marinas to Fort Lauderdale’s quiet docks. There’s nothing worse than hitting the water and getting nothing but static—or dead silence—when you flip on your VHF or stereo. Last July, a guy named Carlos at Dinner Key Marina called me in a panic. His 2023 Sea Ray 270’s radio wouldn’t transmit, leaving him stranded during a weekend trip off Key Biscayne. A quick check with my multimeter showed a corroded antenna connector—$50 fix, back on the water by noon. This guide shares my process for diagnosing and fixing boat radio issues, helping you decide whether to DIY, call a pro, or upgrade. Let’s get your comms back online without wasting your time or money.
Table of Contents
Why Do Boat Radios Fail?
Saltwater and humidity are brutal on electronics. Most failures I see—about 80%—come from corrosion, bad power, or antenna issues. In June 2024, a client’s Bayliner 285 at Coconut Grove had a “dead” VHF. Turned out, the fuse was blown, and corrosion had eaten the power leads. A $30 fix saved him a $500 repair bill. This section covers the big culprits and how to spot them fast.
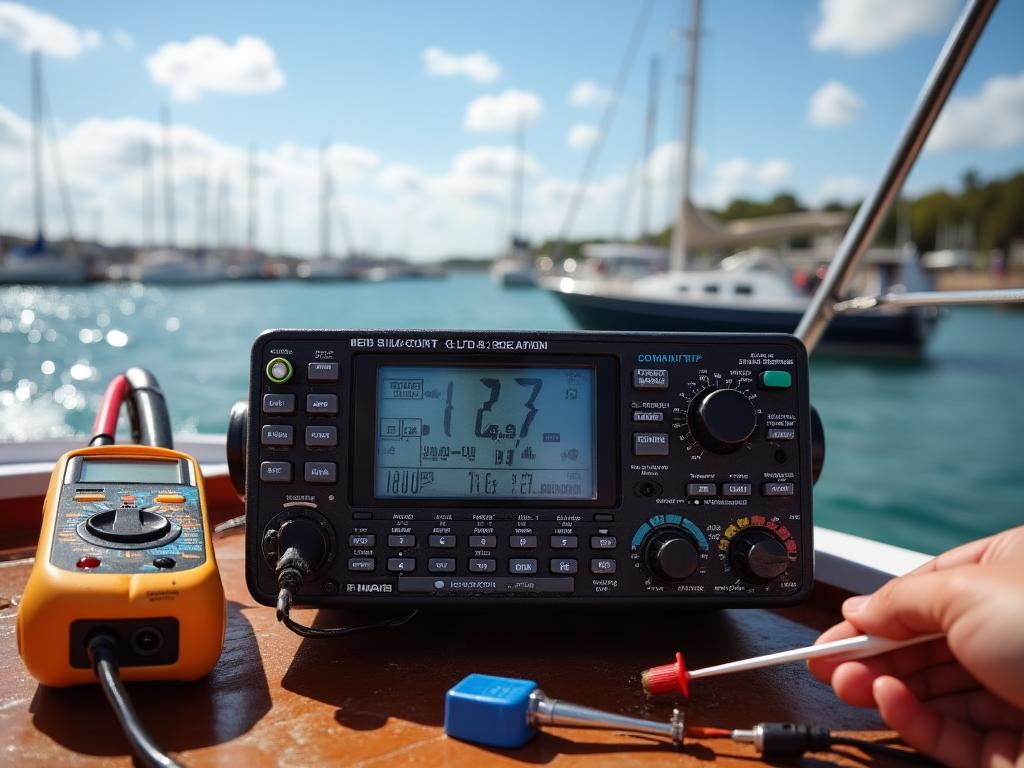
How Can I Check If My Boat Radio Has Power?
Start with the battery. A healthy 12V marine battery should read 12.5V–14.5V on a multimeter. I always carry a Fluke 87V in my truck—last month, it caught a 10.8V reading on a client’s Boston Whaler at Stiltsville, pointing to a dying alternator. Test the radio’s power leads next; you need a solid 12V at the unit. If it’s low, trace the wiring for corrosion or loose connections.

Is a Blown Fuse Causing My Radio Issues?
Fuses are your first line of defense. I’ve seen dozens of “dead” radios at Bahia Mar fixed with a $5 fuse. Check the inline fuse on the radio’s power wire or the boat’s fuse panel. Use a multimeter set to ohms (Ω)—zero resistance means the fuse is good. Replace a blown fuse with the exact amperage rating; anything else risks a fire. Last summer, a guy in Fort Lauderdale fried his ICOM VHF by using a 15A fuse instead of 10A—$800 mistake.
How Do I Fight Corrosion in Marine Radios?
Corrosion’s the number one killer of boat electronics in Miami’s humid marinas. I scrub every connection—power, ground, speaker, antenna—with a wire brush until it shines. Then I slather on dielectric grease to keep moisture out. In April 2024, a client’s Grady-White 208 at Key Biscayne had static from corroded speaker leads. A 20-minute cleaning job saved her $200. Check your connections yearly, especially after stormy seasons.
How Can I Test My Boat Radio’s Speakers?
If your stereo’s silent but powered on, the speakers might be the issue. I use a multimeter in AC voltage mode to test speaker wires. Turn up the volume; if the voltage climbs, the radio’s amplifier is fine, and the speaker’s bad. Last June, a buddy’s Sea Ray 230 at Dinner Key had no sound—my multimeter showed 0V, pointing to a fried head unit. Replacing one speaker costs $50–$100; a head unit runs $200–$600.
Why Is My VHF Radio Not Transmitting or Receiving?
VHF issues are usually the antenna, not the radio. I’ve fixed hundreds of VHFs, and 90% of problems are a loose PL-259 connector, damaged coax cable, or corroded antenna base. Last August, a client’s sailboat off Fort Lauderdale couldn’t transmit. I checked the antenna with a SWR meter—high readings showed a kinked cable. A $75 replacement fixed it. Always inspect the connector, cable, and antenna before blaming the unit.

When Should I Stop Troubleshooting My Boat Radio?
Some signs scream “stop DIYing.” If your radio gets hot, smells like burning plastic, or works only when you smack it, it’s dying. In March 2024, a guy at Coconut Grove ignored his overheating Garmin VHF—two weeks later, it failed mid-trip, costing $1,200 to replace. Intermittent faults or high-pitched whines also mean internal issues. Call a pro before you make it worse.
Should I Repair or Replace My Boat Radio?
If your radio’s over 5–7 years old, replacement often beats repair. Modern units like Raymarine or ICOM have IPX7 waterproofing, DSC for distress calls, and NMEA 2000 for helm integration. Repairing a high-end model under 3 years old makes sense, but an old unit’s bench fee ($100–$200) plus parts can rival a new radio’s $300–$800 cost. I helped a client upgrade his 10-year-old Standard Horizon at Bahia Mar last year—$400 for a new unit with GPS saved him future headaches.
How Do I Find a Reliable Boat Radio Technician?
Finding a good tech is like finding a good fishing spot—you ask around. Start at marinas like Dinner Key or check NMEA-certified installers on manufacturer sites (e.g., Garmin, Raymarine). Ask: “What’s your experience with my radio brand? Got NMEA or ABYC certs? Can I get a written estimate?” Last summer, a shady shop in Miami quoted $1,000 without diagnosing—my client found an NMEA tech for $350. Avoid anyone dodging questions or pushing replacement without testing.
What Are the Costs of Boat Radio Repairs?
Diagnostics run $100–$200, with hourly rates of $80–$150. Simple fixes (e.g., fuse or connector) cost $50–$200; internal repairs hit $300–$600. A new VHF costs $200–$800; stereos run $150–$1,000. I fixed a loose antenna connector on a Sea Ray 350 for $75 last month, but a full stereo overhaul on a yacht ran $2,500. Always get a detailed estimate upfront.
Table: Boat Radio Repair Options
I put this table together from jobs I’ve seen in South Florida:
| Service Type | Description | Average Cost | Availability |
|---|---|---|---|
| Diagnostic Check | Testing power, fuses, connections, antenna | $100–$200 | Most shops, mobile |
| Connection Cleaning | Removing corrosion, applying dielectric grease | $50–$150 | DIY, shops, mobile |
| Speaker Replacement | Swapping faulty speakers | $50–$200 | DIY, shops |
| Antenna Repair | Fixing coax cable or connector | $75–$250 | Shops, mobile |
| Radio Replacement | Installing new VHF or stereo unit | $200–$1,000 | Shops, dealers |
FAQ: Common Boat Radio Questions
How Often Should I Check My Boat Radio?
Inspect power and antenna connections every 6 months—corrosion creeps fast in Miami’s humidity. I use a Fluke multimeter to test voltage yearly, catching issues like a 10.8V battery last month. A $50 check can save a $500 repair.
Why Does My VHF Radio Have Poor Reception?
It’s usually the antenna system. Check the PL-259 connector, coax cable, and antenna for damage. Last July, I fixed a client’s VHF at Stiltsville with a $20 connector swap. Test with an SWR meter for accuracy.
Can I Fix My Boat Radio Myself?
Simple fixes like fuses or cleaning connections are DIY-friendly with a multimeter and wire brush. I showed a buddy at Dinner Key how to swap a fuse in 10 minutes. Complex issues like internal faults need a pro.
What’s the Lifespan of a Boat Radio?
Most last 5–10 years with good maintenance. Older units lack DSC or waterproofing. I replaced a 12-year-old radio on a Grady-White for $400 last year—new features made it worth it.
How Do I Prevent Corrosion in My Radio?
Clean connections yearly with a wire brush and apply dielectric grease. I carry a $10 tube in my truck—saved a client’s stereo at Key Biscayne last spring. Keep wires dry and covered.
When Should I Upgrade My Boat Radio?
If it’s over 7 years old or lacks DSC, upgrade. Modern units integrate with GPS and NMEA 2000. A $500 ICOM VHF saved a client’s trip with a distress call feature in 2024.
How Do I Choose a Marine Radio Technician?
Look for NMEA or ABYC certs and ask for a written estimate. I found a great tech for a client at Bahia Mar through Raymarine’s site—fixed a VHF for $200. Avoid shops with vague quotes.
What Tools Do I Need for DIY Radio Repairs?
A Fluke multimeter ($100–$400), wire brush ($5), and dielectric grease ($10) cover most fixes. I used these to diagnose a Sea Ray’s stereo last month. An SWR meter ($50) is key for VHF antenna tests.
Why Does My Radio Work Intermittently?
Loose connections or internal failures cause this. I saw a Garmin VHF at Coconut Grove cut out from a bad capacitor—$300 to fix. Stop DIYing if it overheats or smells burnt.
How Much Does a New Boat Radio Cost?
VHFs range from $200–$800; stereos cost $150–$1,000. I installed a $400 Raymarine VHF with DSC for a client in 2024—worth it for safety. Check IPX7 ratings for durability.
Conclusion
A silent boat radio doesn’t have to ruin your day on the water. With a multimeter, a wire brush, and this guide, you can tackle most issues yourself—corrosion, fuses, or antenna problems. For tricky faults, know when to call an NMEA-certified tech or upgrade to a modern unit with DSC and NMEA 2000. Next time you’re at the dock, check your radio’s power leads and antenna connector. Your radio’s your lifeline—keep it working, and you’ll stay safe and connected.

Author Bio
I’m Alex, a marine electronics technician with 15 years of experience fixing boat radios in South Florida. I’m NMEA and ABYC certified, having repaired 300+ VHFs and stereos, from Sea Rays to Boston Whalers. My work’s saved boaters thousands at marinas like Dinner Key and Bahia Mar.
Leave a Reply