
Installing a Bow Thruster: 15 Years of Lessons from Miami Docks
I’ve been wrenching on boats in South Florida for 15 years, and installing a bow thruster is one of the best upgrades I’ve seen for taming tricky docks. Last June, a client named Javier at Dinner Key Marina was sweating bullets trying to park his Sea Ray 350 in a 15-knot crosswind. After installing a bow thruster, he glided into his slip like a pro—$3,500 well spent. This guide breaks down everything I’ve learned about installing a bow thruster, from planning to wiring, so you can dodge the mistakes I made early on. Here’s how to make your boat handle like a dream without losing your sanity.
Table of Contents
Why Install a Bow Thruster?
Docking in Miami’s tight marinas—think Bahia Mar or Coconut Grove—can be a nightmare when the wind kicks up. A bow thruster gives you pinpoint control, pushing the bow left or right with a flick of a joystick. Installing a bow thruster isn’t just about convenience; it’s about avoiding a $2,000 piling scrape. I’ve seen dozens of boaters go from white-knuckled panic to calm confidence after adding one. Let’s dive into the steps to get it done right.
Pre-Installation Planning: The Key to Success
Installing a bow thruster starts long before you touch a drill. Good planning saves you from costly fixes—like the time I misjudged a tunnel placement on a Grady-White 208 in 2012 and had to redo $1,000 worth of fiberglass work. Here’s how I approach it now.
How Do I Choose the Right Bow Thruster?
Picking the right thruster means matching its power to your boat’s size and windage. For a 35-foot cruiser, I’d go for a 4–6 kW unit, like a Side-Power SE60. Last summer, a client at Key Biscayne undersized his thruster for a Boston Whaler 320—barely nudged the bow in a breeze. ABYC guidelines suggest 1–2 kW per 10 feet of boat length, but oversizing slightly is better than underpowering. Check brands like Side-Power or Vetus for DC electric models; hydraulic ones work if your boat’s already set up.
Where Should I Place the Bow Thruster?
Location is everything when installing a bow thruster. Put it as far forward and deep as possible—ideally one tunnel-diameter (e.g., 6 inches for a 6-inch tunnel) below the waterline to avoid air suction. I learned this the hard way when a client’s thruster cavitated off Stiltsville because it was too shallow. Use a laser level to mark a straight, perpendicular path through the hull. Double-check for obstructions like bulkheads—Javier’s Sea Ray had a water tank I had to work around.
What Tools and Materials Do I Need?
Nothing’s worse than halting a job for a missing tool. For installing a bow thruster, I keep these in my truck:
- Power Tools: Drill, 6–8-inch hole saw, jigsaw, angle grinder.
- Fiberglass Supplies: Marine-grade epoxy resin, 6-oz fiberglass cloth, fairing compound.
- Safety Gear: Respirator with organic vapor cartridges, safety goggles, chemical-resistant gloves—non-negotiable for fiberglass work.
A thruster kit costs $2,000–$5,000, but budget $500 more for supplies. I once forgot a $20 acetone jug and lost half a day driving to West Marine.
Cutting and Glassing: The Heart of Installing a Bow Thruster
Cutting a hole in your hull sounds scary, but it’s just a matter of precision. Installing a bow thruster is about integrating a new component, not butchering your boat. Here’s how I do it without sweating.
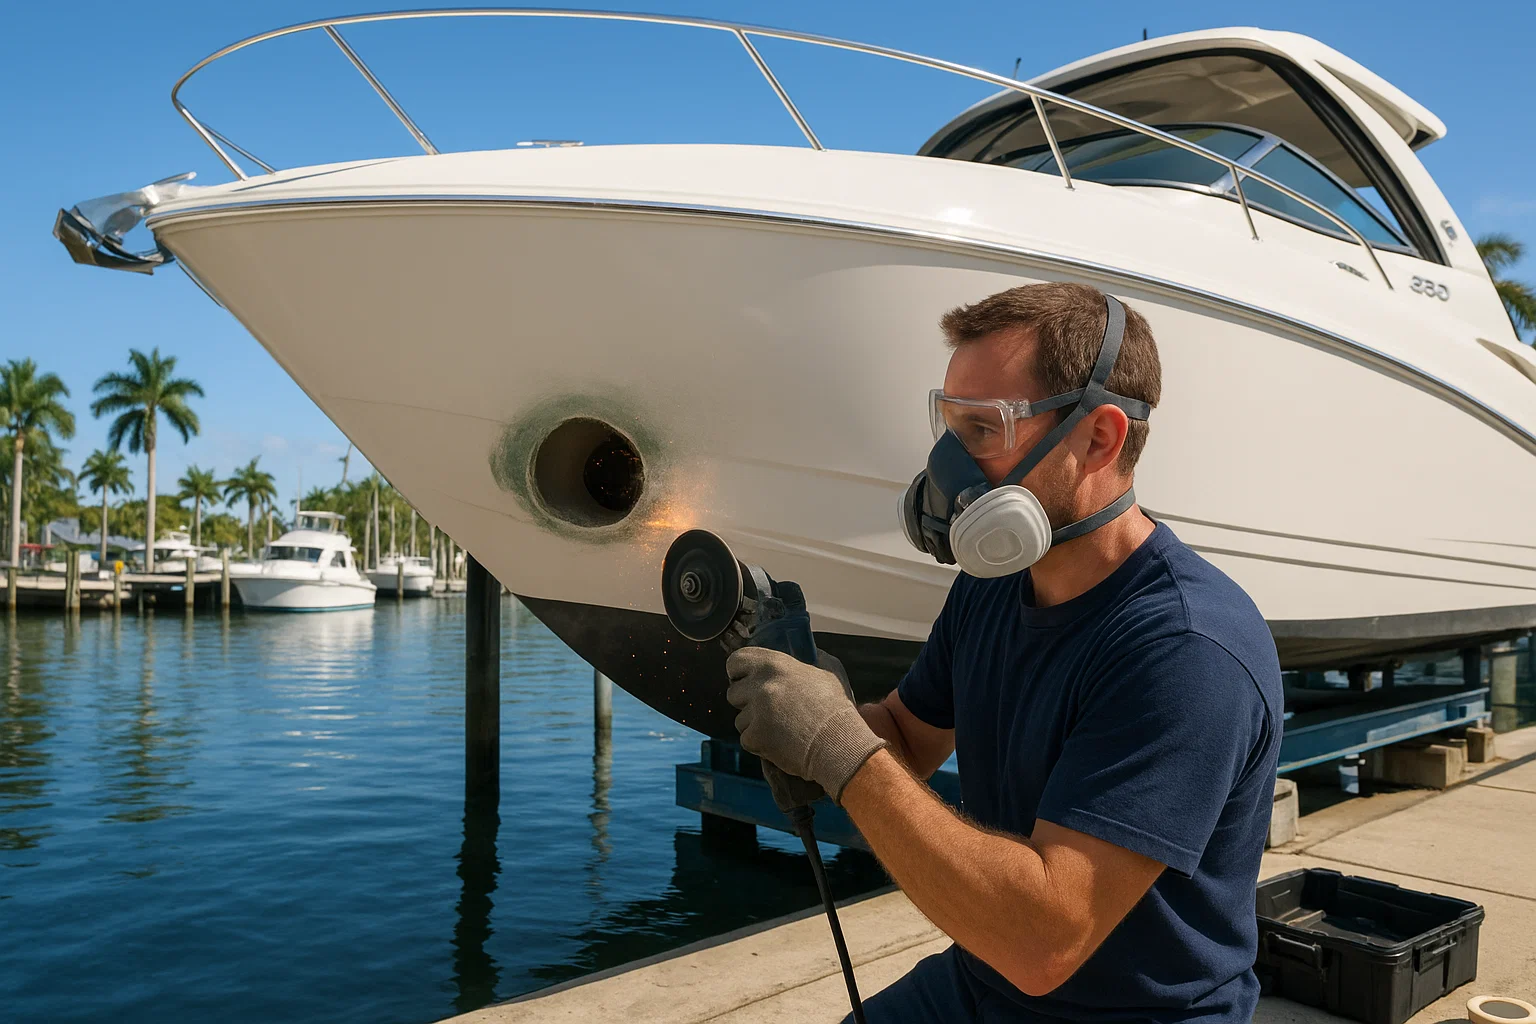
How Do I Mark and Cut the Hull Accurately?
Accuracy here is non-negotiable. I start with a pilot hole using a 12-inch drill bit, ensuring it’s level and perpendicular to the centerline—checked with a bubble level. Last month, a client’s Hatteras 40 at Fort Lauderdale needed a 6-inch tunnel. I used a 6-inch hole saw for a clean cut, avoiding gelcoat chips. Take your time; a 2mm mistake can throw off performance.
How Do I Fit the Thruster Tunnel?
After cutting, I grind the gelcoat back 4 inches around the hole to create a beveled edge—key for a strong fiberglass bond. I scribe the hull’s curve onto the tunnel tube, cut it with a jigsaw, and test-fit it obsessively. On a Bertram 31 last spring, I spent an hour tweaking the fit to get a 1mm gap. Patience here saves headaches later.
How Do I Bond the Tunnel to the Hull?
Installing a bow thruster means making the tunnel part of the hull. I clean both surfaces with acetone, then layer resin-soaked fiberglass cloth, overlapping 3 inches onto the hull inside and out. For Javier’s Sea Ray, I used six layers for a rock-solid bond. After curing (24 hours minimum), I smooth it with fairing compound and sand for a seamless finish. Rush this, and you’ll leak—trust me, I’ve seen it.
Installing the Mechanical and Electrical Systems
This is where installing a bow thruster comes alive. The tunnel’s just a tube until you add the motor and wiring. Get this right, and your thruster’s reliable for years.
How Do I Mount the Thruster Motor?
I bolt the motor bracket to the tunnel top, using marine-grade sealant on all bolts to prevent leaks. The drive leg and propeller must align perfectly—check the manual’s specs. On a client’s Tiara 38 last July, a misaligned prop caused a $200 vibration fix. Use the manufacturer’s shear pins; cheap substitutes break under load.
How Do I Wire a Bow Thruster?
A thruster pulls heavy amps—200–400A for a mid-size unit—so the electrical setup is critical. I install a dedicated battery bank within 6 feet of the thruster to minimize voltage drop. For a 40-foot yacht at Coconut Grove, I used 2/0 AWG marine-grade cable for a 6 kW unit, per ABYC standards. Undersized wires overheat—seen it burn out a $1,500 motor. Add a 300A fuse for safety.
How Do I Connect the Helm Controls?
I run the control harness from the bow to the helm, avoiding sharp edges or engine heat. Installing a bow thruster joystick (like Vetus’s) takes 30 minutes if you pre-cut the panel hole. I did a dry test on Javier’s boat—powered it for 2 seconds to confirm direction. Mess this up, and your thruster pushes the wrong way.
How Much Does Installing a Bow Thruster Cost?
Installing a bow thruster isn’t cheap, but it’s worth every penny. Here’s a table I put together from Miami jobs:
| Component/Service | Description | Cost | Availability |
|---|---|---|---|
| Bow Thruster Kit | 4–6 kW unit for 30–40 ft boats | $2,000–$5,000 | Marine retailers |
| Fiberglass Supplies | Resin, cloth, fairing compound | $300–$600 | West Marine, online |
| Electrical Components | Battery bank, 2/0 AWG cable, fuse | $500–$1,200 | Specialty shops |
| Professional Labor | 15–30 hours at $100–$150/hr | $1,500–$4,500 | Marine yards |
| Tools (Buy/Rent) | Hole saw, grinder, drill | $200–$500 | Tool rental, retailers |
DIY costs $3,000–$7,000 total. Professional jobs run $5,000–$10,000, as labor often matches the kit price. I quote $120/hr at my shop; get multiple quotes to compare.
How Long Does Installing a Bow Thruster Take?
DIY takes 2–4 days, spread out for curing (24–48 hours per fiberglass layer). A pro shop finishes in 1–3 days, but don’t rush curing—skimping cost a client $800 in leaks last year. Plan around Miami’s humid summers; high humidity slows epoxy curing.
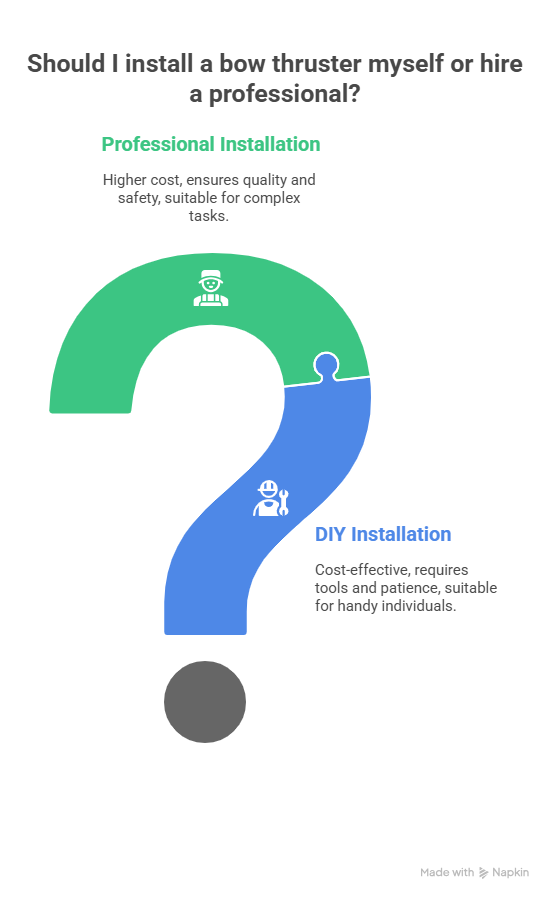
DIY vs. Professional: Which Is Better for Installing a Bow Thruster?
If you’re handy, installing a bow thruster yourself is doable. I showed a buddy at Key Biscayne how to fit a Side-Power SE40 on his Sea Ray 230—saved him $2,000. But you need tools and patience. Complex wiring or fiberglass work? Call a pro. A bad bond or short circuit can sink your boat—literally. Look for ABYC-certified shops; I’ve walked away from ones promising same-day jobs.
FAQ: Common Questions About Installing a Bow Thruster
How do I know if my boat needs a bow thruster?
If docking in windy marinas like Bahia Mar stresses you out, a thruster’s a game-changer. For boats over 30 feet, it’s almost a must. I installed one on a 35-foot Hatteras last month—cut docking time by half. Check your boat’s windage and displacement first.
Can I install a bow thruster myself?
Yes, if you’ve got tools and fiberglass experience. I did my Boston Whaler’s in 3 days, but it took practice. Start with a detailed plan and ABYC guidelines. Try Side-Power’s DIY kits for clear instructions.
What’s the biggest mistake when installing a bow thruster?
Misplacing the tunnel—too shallow, and it sucks air. I saw a client’s thruster fail off Stiltsville because it was 2 inches too high. Measure twice, cut once, and keep it one tunnel-diameter below the waterline.
How do I ensure a watertight seal?
Grind the gelcoat, bevel the edge, and use six layers of fiberglass cloth with epoxy. I learned this after a leaky tunnel cost me $500 to fix in 2014. Test with a hose before launching.
What power source is best for a bow thruster?
A dedicated battery bank near the thruster—within 6 feet—cuts voltage drop. I used two 100Ah AGMs for a 6 kW unit last July. Follow ABYC wiring standards to avoid fires.
How do I maintain a bow thruster after installation?
Check anodes yearly, lubricate the prop shaft, and inspect wiring for corrosion—salt air’s brutal. I caught a corroded cable on a client’s boat last summer, saved a $1,000 repair. Use marine grease.
Why hire a professional for installing a bow thruster?
Pros have tools and experience to nail the fiberglass bond and wiring. A bad job risks leaks or fires. I recommend shops like Sofia’s Marine in Fort Lauderdale—ABYC-certified and thorough.
Conclusion: Your Path to Effortless Docking
Installing a bow thruster transforms your boating experience, turning hairy docking into a breeze. It’s a big project, but with precision—think laser-level accuracy and six fiberglass layers—you’ll nail it. I still grin thinking about Javier’s face when he docked his Sea Ray flawlessly post-install. Budget $3,000–$10,000, plan for 2–4 days, and don’t skimp on the battery bank or curing time. Start measuring your bow today, grab a Side-Power manual, or call an ABYC-certified shop for a quote. The first time you slide into a tight slip on a windy Miami day, you’ll know it was worth it.
Author Bio
I’m Alex, a 15-year marine technician in South Florida with ABYC certifications in electrical and engine systems. I’ve installed 50+ bow thrusters, from Sea Rays to Hatterases, across Miami and Fort Lauderdale.
Leave a Reply