
I’ll never forget the first beautiful spring day a few years back. The sun was out, the air was warm, and all I wanted to do was get my boat on the water. I went to hook up the trailer, and that’s when the nightmare began. One tire was completely flat-spotted and cracked, the winch was a solid block of rust, and the lights were dead. My perfect launch day turned into a weekend of expensive, frustrating repairs.
That was the last time I ever skipped winterizing my boat trailer. It’s a lesson many boaters learn the hard way. We spend so much time and money on our boats that the trailer becomes an afterthought. But that trailer is your ticket to the water, and neglecting it is a surefire way to ruin your next season before it even starts.
This guide isn’t just a checklist. It’s a collection of hard-won lessons from years of experience. Think of me as your boating buddy who has already made all the mistakes so you don’t have to. We’re going to walk through a real-world process for winterizing your boat trailer to make sure it survives the off-season and is ready to roll the moment you are.
Table of Contents
The First Step: A Thorough Inspection
Before you do anything else, you need to know what you’re working with. A pre-winter inspection is the foundation of a good winterizing plan.
Give It a Good Scrub
Start by giving your trailer a deep clean. I’m talking about getting into all the nooks and crannies with a pressure washer or a stiff brush. Get all the mud, grime, and especially any aquatic weeds off the frame, axles, and fenders. Trapped dirt holds moisture, and moisture is the breeding ground for rust. This simple step is critical for proper winterizing of your boat trailer.
Eyes on the Prize: Look for Damage
Once it’s clean, you can actually see what’s going on. Do a slow walk-around and look for:
- Rust Spots: Pay close attention to welds and any areas where paint is chipped.
- Cracks: Check the frame, tongue, and axle mounts for any stress cracks.
- Bent Components: Look at the fenders and frame cross-members.
Take a few pictures of any problem areas. It’s good to have a record. A small spot of rust can be easily fixed now, but after a long, wet winter, it can become a major structural problem. Proper winterizing of your boat trailer starts with knowing its condition.
The Mechanicals: Bearings, Brakes, and Moving Parts
This is where the real work of winterizing your boat trailer happens. These components are the most vulnerable to winter damage.
Wheel Bearings are Everything
If your trailer has a heart, it’s the wheel bearings. If they fail, you’re not going anywhere. Moisture is their mortal enemy.
- Grease them up: Use a quality marine-grade grease and pump it into the bearing protectors until you see the old grease start to come out. This pushes out any water that might be hiding in there.
- Check for play: Jack up the wheel and give it a wiggle. If there’s a lot of play or a grinding noise, your bearings might be shot and need replacing. This is a job you want to do now, not on the side of the highway.

Brakes and Lug Nuts
If your trailer has brakes, check the fluid level and inspect the lines for cracks. Top off the fluid with the correct type. For safety, use a torque wrench to check that all the lug nuts are tightened to the manufacturer’s specs.
Lubricate Everything That Moves
Winter loves to seize up moving parts. Go around with a can of marine-grade lubricant or grease and hit:
- The winch gears
- The hitch coupler
- The tongue jack
- The rollers and bunk pivots
A little lubrication now makes for a much smoother experience in the spring. This is a key part of the winterizing your boat trailer process.
The Foundation: Bunks, Rollers, and Lights
Support Your Boat
Your boat will be sitting on the trailer for months. Inspect the bunks and rollers carefully.
- Bunk Carpet: Look for tears or worn spots where wood or staples could scratch your hull.
- Rollers: Check for cracks or flat spots. Make sure they all spin freely.
Damaged bunks or rollers can do serious damage to your boat’s hull over a long winter. This is a crucial check when winterizing your boat trailer.
Protect Your Electrical System
Trailer lights are notoriously finicky, and winter moisture is their worst enemy.
- Clean the connections: Unplug the main wiring harness and any other connectors. Use a small wire brush to clean off any corrosion.
- Dielectric Grease: This stuff is your best friend. Put a liberal amount on all the electrical pins and connections. It creates a waterproof barrier that prevents corrosion.
- Test the lights: Hook the trailer up and test every light—brake lights, turn signals, running lights. It’s much easier to fix a bad bulb or a loose wire now in your driveway than in the dark at the boat ramp next spring. This simple test is a vital step in winterizing your boat trailer.
Tires and Storage: The Long Winter’s Nap
How you store your trailer is just as important as the prep work.
Tire Care is Crucial
Tires hate sitting in one spot for months, especially in the cold.
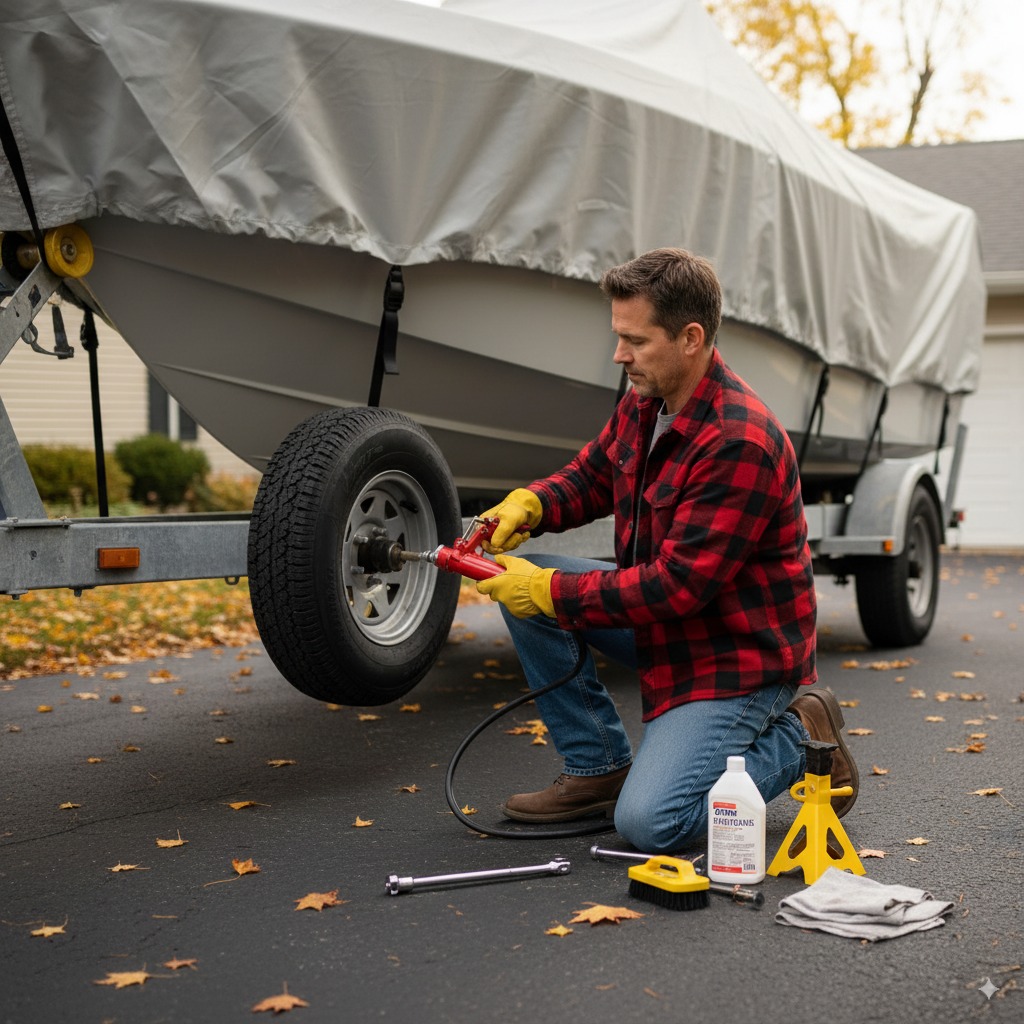
- Inflate to Max PSI: Inflate your tires to the maximum pressure listed on the sidewall. This helps prevent flat spots from developing.
- Block it Up: The best thing you can do for your tires and bearings is to get the weight off them. Jack up the trailer and support the frame on sturdy jack stands or concrete blocks. You can then remove the tires and store them inside, away from the sun and cold. This is the pro move for winterizing your boat trailer.
Storage Options: Pros and Cons
| Storage Option | Cost | Protection Level | My Take |
|---|---|---|---|
| Indoor (Garage/Shed) | Free (if you have it) | Excellent | The gold standard. Keeps it completely out of the elements. |
| Covered Storage | $$ | Very Good | A carport or dedicated storage facility works great. |
| Quality Tarp/Cover | $ | Good | A breathable, waterproof cover is a must for outdoor storage. |
| Outdoor (Uncovered) | Free | Poor | The last resort. The sun and weather will take their toll. |
No matter where you store it, use good, heavy-duty ratchet straps to secure your boat to the trailer. Winter winds can be surprisingly strong. A dedicated winterizing your boat trailer cover can also offer an extra layer of protection.
FAQ: Questions I Get All the Time
Do I really need to do all this every year?
Yes. An hour or two of work now can save you a full weekend of headaches and hundreds of dollars in the spring. Winterizing your boat trailer is not a step to skip.
What’s the single most important step?
Wheel bearings. A failed bearing can leave you stranded and can cause major damage to your axle. If you only do one thing, make it the bearings.
Can I just use a regular tarp from the hardware store?
You can, but I don’t recommend it. They aren’t breathable and can trap moisture underneath, which can lead to mold, mildew, and corrosion. A proper boat cover is worth the investment.
What if I find a lot of rust on the frame?
If it’s just surface rust, you can sand it down, treat it with a rust converter, and repaint it. If it’s deep and flaking, or if you see cracks, it’s time to take it to a professional welder or trailer shop.
Is winterizing my boat trailer different for saltwater vs. freshwater?
The process is the same, but it’s even more critical for saltwater trailers. Salt is incredibly corrosive. You need to be extra diligent about washing every bit of salt off and checking for corrosion.
Key Takeaways: My Final Advice
Alright, let’s wrap this up. Winterizing your boat trailer isn’t complicated, but it is important. If you want a trouble-free spring, you have to put in a little work in the fall.
- Clean and Inspect First: You can’t fix what you can’t see. A thorough cleaning is the start of any good winterizing job.
- Grease is Your Friend: Lubricate your wheel bearings, winch, jack, and anything else that moves. Moisture and rust are your enemies.
- Take the Weight Off: Jacking up your trailer and taking the weight off the tires is the best way to protect them and your bearings through the long off-season.
- Don’t Forget the Details: Check your lights, bunks, and straps. The little things are what often cause the biggest problems.
- Cover It Up: Protect your investment from the winter elements. A good cover or indoor storage will add years to the life of your trailer.
Taking these steps now means you’ll be one of the first ones on the water next season, while others are stuck in their driveways with a wrench in their hand.
Author Bio
I’m Alex, a passionate boater with over 20 years of hands-on experience maintaining and repairing my own equipment. I’ve learned all the tricks for winterizing a boat trailer the hard way—through trial, error, and a few frustrating launch days. My goal is to share that practical, real-world knowledge to help fellow boaters save time, and money, and maximize their time on the water.
Leave a Reply