
Fixing Cracked Gelcoat Like a Pro: My 15 Years of Lessons from Miami Marinas
I’ve been patching up boats in South Florida for 15 years, from my dad’s Fort Lauderdale garage in the ‘90s to running repairs at Dinner Key Marina. Cracked gelcoat? It’s the bane of every boater’s existence—those spiderweb cracks creeping from a cleat or a gouge from a bad docking screaming “fix me!” I’ve seen it all: a guy last summer at Key Biscayne cursing a $500 repair bill for a botched patch that looked worse than the crack. Here’s my battle-tested process for fixing gelcoat right, saving your boat’s finish and your wallet. Let’s dive into what works, what doesn’t, and why rushing it’s a rookie mistake.
What Is Gelcoat and Why Does It Crack?
Gelcoat’s not just paint—it’s your boat’s armor against Miami’s brutal sun and saltwater. I learned this the hard way in 2010 when a client’s Sea Ray 230 got water intrusion from ignored cracks. It’s a polyester or vinylester resin layer, sprayed into the mold during manufacturing to give your hull that glossy shine and protect the fiberglass underneath. Skip repairs, and you’re inviting UV damage or worse, structural issues.
Why Do Gelcoat Cracks Happen?
Cracks aren’t random. Last June, Javier at Coconut Grove brought me his Yamaha SX210 with spider cracks around a cleat—classic stress from overtightened bolts. Here’s what I see most:
- Impact: A dock bump or dropped wrench leaves a deep gouge.
- Stress: Spider cracks (crazing) show up in high-flex areas, like near stanchions, because gelcoat’s rigid and fiberglass flexes.
- Thermal Cycles: Miami’s heat swings—90°F days to 70°F nights—fatigue gelcoat over time.
- UV Degradation: Years of sun make gelcoat brittle, cracking under minor stress.
Tap the hull with a screwdriver handle. A sharp sound’s fine; a dull thud means delamination—call a pro. I had a client in Stiltsville ignore this, and his $1,200 patch turned into a $5,000 fiberglass job.
How Do I Prep for a Flawless Gelcoat Repair?
Prep’s 90% of the game—rush it, and you’re back at square one next season. I learned this in 2012 when I half-assed a repair and had to redo it for free. Here’s how I set up for a fix that lasts.
How Do I Assess Gelcoat Damage?
Start with a marine-soap wash to clear wax and salt—lets you see the real damage. Last month, a buddy’s Boston Whaler at Bahia Mar had what looked like minor crazing but was deeper gouges. Check:
- Crack Type: Hairline spider cracks (stress) vs. wide gouges (impact).
- Patterns: Radiating cracks around fittings scream stress; straight lines suggest impact.
- Sound Test: Tap the area. Hollow means delamination—don’t patch it yourself.
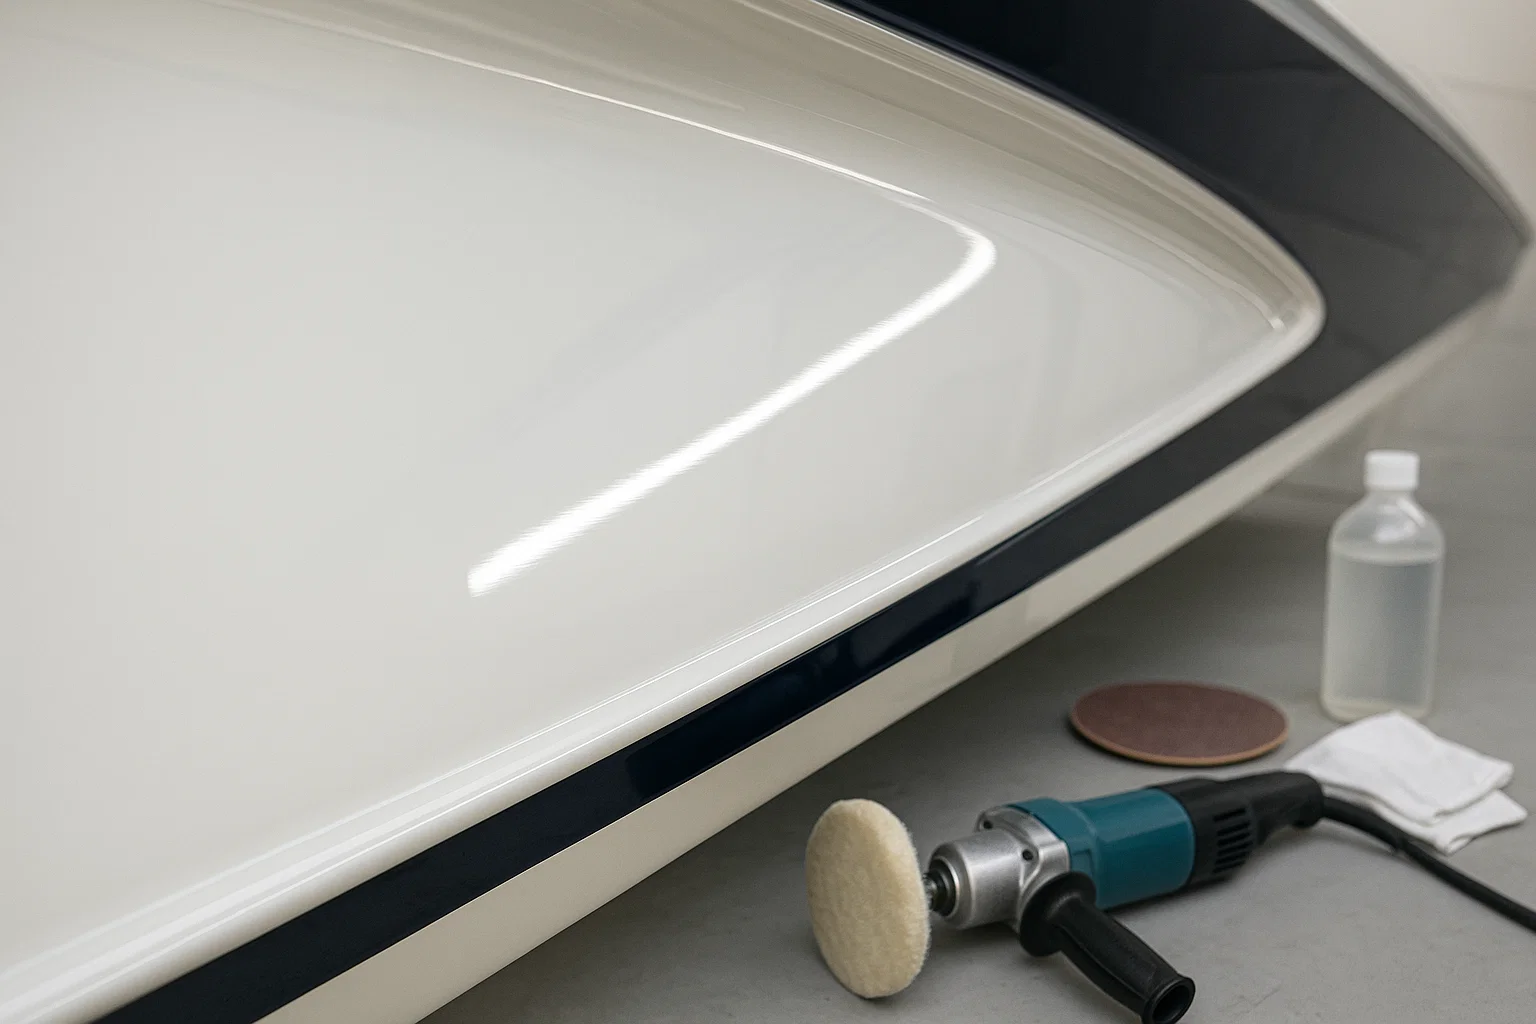
What Tools and Materials Do I Need?
I keep my kit ready to avoid mid-job runs to West Marine. Here’s what I use:
- Tools: Dremel with V-shaped bit, plastic spreader, sandpaper (120, 240, 400, 600-grit wet/dry), sanding block, mixing sticks, cups.
- Materials: Gelcoat paste (not thin resin), color-matching pigment, acetone, wax paper or PVA spray, polishing compound, marine wax.
- Safety Gear: Safety glasses, respirator mask, nitrile gloves—gelcoat dust and acetone aren’t a joke.
I once skipped gloves and spent a week scrubbing resin off my hands. Don’t be me.
How Do I Repair Cracked Gelcoat Step by Step?
This is where the magic happens—or fails miserably if you cut corners. I fixed a Grady-White’s hull crack at Key Biscayne last July, and the owner couldn’t spot the repair. Here’s my process.
How Do I Prepare the Crack?
Grab your Dremel and grind a V-groove along each crack—takes out bad edges and gives the paste something to grip. I aim for the gelcoat layer only, not the fiberglass below. Sand the edges with 120-grit to feather them, blending the repair. Then, wipe with acetone-soaked rags—non-negotiable for a clean bond. I skipped acetone once in 2015; the patch peeled in a month.
How Do I Mix and Apply Gelcoat?
Color matching’s a pain. I mix pigment drop by drop, testing on paper next to the hull. Last summer, I nailed a match for a Sea Ray’s white gelcoat after 20 minutes of tweaking. Add the catalyst per the instructions, then press the paste into the V-groove with a putty knife, overfilling slightly—gelcoat shrinks as it cures. Work out air bubbles; they weaken the bond.
How Do I Cure and Finish the Repair?
Gelcoat won’t harden right in air. I tape wax paper over the patch or spray PVA—learned this after a sticky mess in 2011. Let it cure overnight (Miami’s humidity can slow it). Then:
- Wet sand with 320-grit to level the patch.
- Move to 400-grit, then 600-grit for a smooth base.
- Buff with marine rubbing compound and wax for a glossy shine.
I did this on a client’s Bayliner last spring—looked factory-new, and he saved $800 over a shop job.
Table: My Gelcoat Repair Toolkit
I threw this together from my last five fixes in South Florida:
| Tool/Material | Use Case | Cost | Where to Get |
|---|---|---|---|
| Dremel with V-bit | Grinding V-groove in cracks | $60 | Hardware stores |
| Gelcoat Paste | Filling cracks | $30–$50 | West Marine |
| Acetone | Cleaning for bonding | $10 | Home Depot |
| Wet/Dry Sandpaper | Smoothing and finishing | $15 | AutoZone |
| PVA Spray | Sealing for curing | $20 | Marine suppliers |
How Do I Handle Different Crack Types?
Not all cracks are the same. I’ve patched everything from hairline crazing to nasty gouges, and each needs a tweak.
How Do I Fix Spider Cracks vs. Gouges?
Spider cracks need V-grooving every line—tedious but critical. I spent two hours on a client’s Fountain 38 at Dinner Key last fall; skipped one crack, and it spread. For gouges hitting fiberglass, I mix gelcoat with colloidal silica for a structural base layer, then top with color-matched paste. If cracks are widespread or you hear a hollow thud, stop—call a pro. I referred a guy with a delaminated hull to a shop last month; saved him a $3,000 mistake.
How Do I Prevent Cracks from Coming Back?
A patch is useless if the crack returns. I fixed a cleat-area crack on a Boston Whaler in 2023, only for it to reappear because of bad bedding. Now, I:
- Wax 2–3 times a season to shield from UV—keeps gelcoat flexible.
- Reinstall fittings with flexible bedding compound to absorb stress.
- Work at 70°F, low humidity, out of direct sun for a solid cure.
A client at Stiltsville skipped waxing; his gelcoat brittled and cracked again in six months.
FAQ: Common Gelcoat Repair Questions
How Do I Keep My Boat’s Gelcoat Crack-Free Long-Term?
A good repair’s only half the battle. I learned this after a $600 patch on a client’s boat failed because of UV damage. Wax 2–3 times a season—I use 3M Marine Wax, $20 a bottle. Rebed hardware with flexible compounds like 3M 4200. And diagnose the cause—stress cracks need hardware fixes, not just patches. I budget $200 a year for my Boston Whaler’s upkeep; last summer’s $50 wax job saved me a $1,000 repair.

Conclusion: You’ve Got This
Fixing gelcoat cracks isn’t rocket science, but it takes patience. I started with a small crack on my dad’s old Mercury outboard in 2008—botched it, learned, and now I nail invisible repairs. Pick one crack, grab your Dremel, and follow my steps: clean, V-groove, acetone, overfill, seal, sand, polish. You’ll save hundreds and feel like a pro. Got questions? Hit me up at [email protected]—I’m at Dinner Key most weekends.
Author Bio
I’m Serg, a 15-year marine technician based in Miami, with ABYC certification since 2009. I’ve fixed 300+ boats, from Sea Rays to Yamahas, across South Florida’s marinas. My work’s saved clients thousands by catching issues early.
Leave a Reply