As the boating season winds down, properly preparing your inboard boat motor for the winter months is not just a suggestion—it’s a critical necessity. For owners of inboard boats, skipping this process can lead to costly damage and a delayed start to the next upcoming season. This comprehensive guide will walk you through every step to ensure your marine engine is protected.
Why You Can’t Afford to Skip Inboard Engine Winterization
Ignoring winterization for inboard engines can have dire consequences. When water freezes, it expands with incredible force. If raw water is left inside your engine block or manifolds, this expansion can cause cracks, potentially leading to a complete engine replacement. Beyond freeze damage, moisture can cause corrosion on internal engine components, shortening the life of your boat engines. Proper preparation of your boat for winter is an investment in its longevity and your peace of mind. Many inboard boats have complex systems, and a little preventative care goes a long way.
- How to Winterize Boat Motor: A Comprehensive Guide
- Vibration Test Equipment: Essential Insights for the Marine Industry
- Outboard Engine Installation: Frequently Asked Questions
Essential Tools and Supplies for a Flawless Winterization
Before you begin, gather all necessary items. Having everything on hand makes the process smoother.
Essential Supplies:
- Fuel stabilizer (enough for your fuel tank size)
- Engine oil (correct grade for your marine engine)
- New oil filter (and fuel filter; consider one filter per engine if you have multiples)
- Non-toxic antifreeze (propylene glycol-based, often labeled as RV Antifreeze or marine-specific engine anti-freeze. Look for biodegradable anti-freeze options.)
- Fogging oil
- Grease for fittings
- Basic cleaning supplies
- Rags or absorbent pads for any oil drip
Necessary Tools:
Possibly some misc electrical supplies for battery care.s related to your motor model when preparing to winterize inboard boat motor.
Socket set and wrenches
Screwdrivers
Oil vacuum pump (optional, for easier oil changes) or a suitable container for drained oil
Flushing kit: Fake-A-Lake Motor Flush Tool, or ear muffs and a hose, or a large five-gallon bucket.
Gear puller (potentially for the impeller cover)
Trickle charger or onboard battery charger
Your engine’s service manual or engine manual – this is invaluable!
A thin wire or coat hanger piece to clear drain plugs.
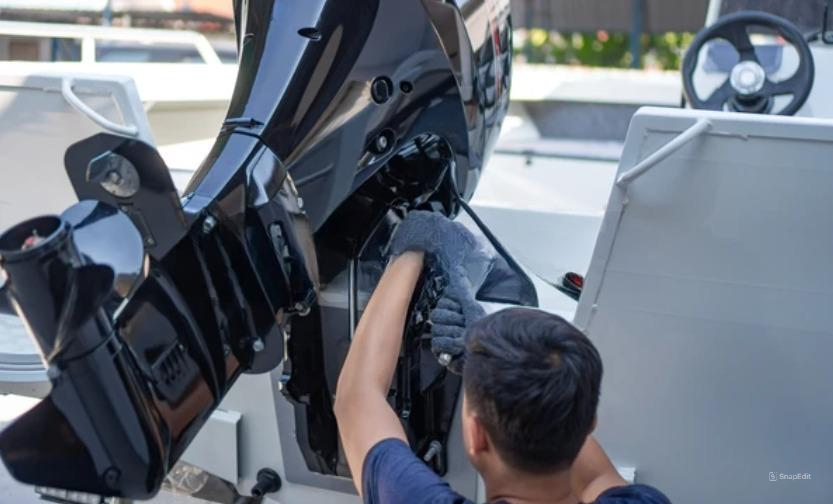
Step-by-Step: Winterizing Your Inboard Boat Motor Like a Pro
Follow these steps carefully for a thorough winterization of your inboard motor.
Step 1: Prepare the Fuel System for the Off-Season
The fuel system needs attention to prevent degradation and water contamination.
- Fill the fuel tank (or gas tank) to about 95% capacity. This reduces air space where condensation can form.
- Add a quality fuel stabilizer to the fuel tank, following the manufacturer’s dosage instructions. Adding fuel stabilizer is crucial.
- Run the inboard boat motor for 10-15 minutes. This allows the stabilized fuel to circulate through the entire system, including fuel lines, the fuel pump, and carburetor or injectors. For gasoline engines, this is especially important.
Step 2: Change Engine Oil and Oil Filter
Old oil contains acids and contaminants that can harm your engine during storage.
- Warm up the marine engine for a few minutes to allow the oil to flow more easily.
- Turn off the engine. Either use an oil vacuum pump through the dipstick tube or drain the oil through the engine’s oil drain system. Be prepared for a potential oil drip.
- Replace the oil filter. Remember, one oil filter and fuel filter per engine.
- Refill the engine with the manufacturer-recommended grade and amount of new oil.
Step 3: Address the Cooling System – The Heart of Winter Protection
This is arguably the most critical part for preventing freeze damage in raw-water-cooled engines and even the raw water side of fresh water cooling systems.
Draining Raw Water Systems
(for raw-water-cooled engines and raw water side of closed systems) Thorough draining is key if you are not using antifreeze throughout the entire system.
- Consult your engine manual to locate all drain plugs. These are typically found on the engine block (these are the block drains), exhaust manifolds, power steering cooler, water lift muffler, transmission cooler, and any low points in hoses. The raw water strainer is a critical component to drain; ensure the raw water strainer is completely empty.
- Remove each drain plug. Use a piece of wire or a coat hanger to gently probe each drain hole to ensure it’s not clogged with rust or debris. Even a small bit of water needs to be drained to prevent damage.
- Disconnect the raw water intake hose from its seacock (sea valve) and ensure it’s fully drained. Also, inspect and drain the raw water strainer again. Many owners forget the raw water strainer.
- If your boat has water pumps for other systems, ensure they are also drained.
- Inspect the impeller housing and consider removing the impeller cover to check its condition. Many opt to replace the impeller in spring time regardless.
For Boats with Fresh Water Cooling
(Closed Cooling) If your inboard motor has a closed cooling system (similar to auto engines in that it uses a permanent coolant mixture on one side):
- The fresh water (coolant) side of your system should already contain proper antifreeze. Check its fluid levels and concentration, topping off or replacing as per your service manual.
- The raw water side of the heat exchanger and exhaust components still needs to be drained as described above or filled with non-toxic antifreeze. Even with fresh water cooling, the raw water components are vulnerable.
Flushing the System
(Optional but Recommended) Flushing with clean water before adding antifreeze can remove salt, silt, and algae.
- If draining completely, you can flush before draining. If adding antifreeze, flush before that step.
- You can use a Fake-A-Lake Motor Flush Tool connected to a garden hose, or ear muffs on the raw water intake hose connection point. Some owners use a bucket style flushing method. The Fake-A-Lake Motor Flush Tool is very effective for this. While an outboard on muffs is a common sight, similar principles apply to inboard flushing tools like the Fake-A-Lake Motor Flush Tool.
Introducing Marine Antifreeze for Ultimate Water System Protection
This step ensures any remaining water mixes with antifreeze, preventing freeze damage. It’s vital for water system protection.
- Once all raw water is drained and drain plugs are reinstalled, prepare your anti-freeze mix.
- Disconnect the main raw water intake hose from the seacock (if not already done) and place it into a five-gallon bucket filled with undiluted non-toxic antifreeze (such as RV Antifreeze). An antifreeze bucket setup can be very useful. Some use antifreeze via muffs.
- Start the engine and let it run until you see the colored anti-freeze exiting the exhaust. This ensures the antifreeze into engine process is complete and the water line antifreeze is distributed. Keep an eye on the water level in the five-gallon bucket; you may need more than one.
- Once antifreeze is circulating, shut down the engine. This fills the engine block and other passages with your chosen anti-freeze mixture. The goal is to have the final mix be protective down to the lowest expected temperatures. Ensure the water with antifreeze mixture is strong enough.
Step 4: Fog the Engine Cylinders for Internal Corrosion Prevention
This coats internal engine parts with a protective layer of oil, preventing rust and corrosion and helping get moisture off engine surfaces.
- Remove the spark plugs.
- Spray a generous amount of fogging oil into each cylinder.
- Briefly crank the engine (without starting it) a few revolutions to distribute the oil.
- Reinstall the spark plugs.
Step 5: Handle Other Onboard Water Systems
Don’t forget other systems that hold water.
- Drain all fresh water tanks and lines, including sinks, showers, and the hot water heater. Open all faucets. Consider using a small compressor to blow out lines or pumping non-toxic antifreeze through them.
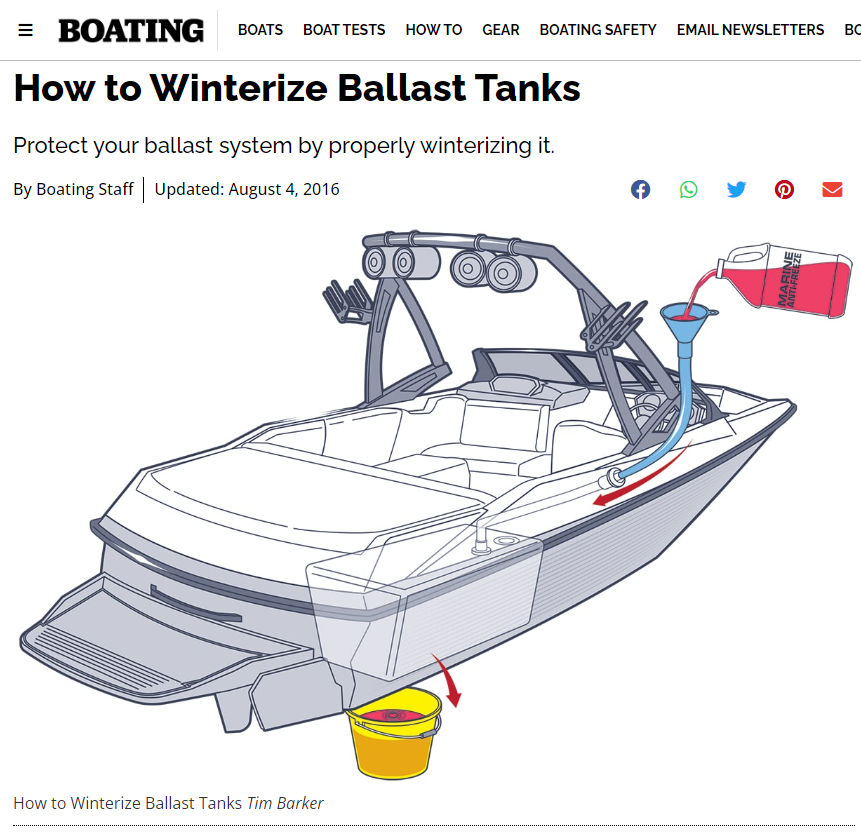
- If you have ballast tanks, follow manufacturer instructions for draining them. Ensure their respective water pumps are also addressed.
- Winterize the head (marine toilet) according to its specific instructions, often involving RV Antifreeze.
- Proper water storage protocols for these systems are key.
Step 6: Battery Care to Avoid a Dead Battery in Spring
A dead battery is a common springtime frustration.
- Perform a full battery check. Clean battery terminals and ensure battery connections are tight and corrosion-free.
- Fully charge the battery.
- Ideally, remove the battery (or batteries) from the boat. Store it in a cool, dry place off the concrete floor.
- Connect it to a trickle charger or a smart battery maintainer throughout the storage period to keep the battery strong and prevent premature battery failure. If your boat has an onboard battery charger and reliable access to power, this can also be used if storage conditions permit.
Step 7: Final Touches in the Engine Compartment and Boat Storage
Leave the engine compartment slightly propped open if possible to allow air circulation and help keep moisture off engine parts.
Clean the engine compartment. A clean bilge makes it easier to spot leaks next season. You might even consider a gentle power wash if it’s very dirty, ensuring sensitive components are protected.
Inspect all hose clamps for tightness and corrosion.
Check for any remaining signs of water contamination in bilges or compartments.
Storing Your Inboard Boat Securely for the Winter Months
How you store your boat for winter is as important as engine winterization.
- If storing outside, use a quality boat cover that is properly supported to shed snow and rain, and allows for ventilation. Ensure it’s boat safe from the elements.
- Ensure the boat is well-supported on its trailer or cradle to prevent hull distortion.
- Consider a final power wash for the hull before covering.
- Preparing the blocks for winter storage on land is a common practice.
Top Mistakes to Avoid When Winterizing Your Inboard Boat
Forgetting the raw water strainer: This component can hold a surprising amount of water. Check the raw water strainer at least twice!
Missing drain plugs: Forgetting even one can cause significant damage.
Insufficient antifreeze: Not using enough or an improper anti-freeze mixture won’t provide adequate protection.
Neglecting fuel stabilizer: Leads to gummed-up fuel lines, a clogged fuel filter, and issues with the fuel pump. A water separator unit should also be checked and drained.
Improper battery care: Results in a dead battery or reduced battery life.
Not consulting the engine manual or service manual: Each inboard motor can have specific needs.
How to Choose the Best Boat Hull Repairs Near Me: A Step-by-Step Guide
FAQs: Your Inboard Winterization Questions Answered
Conclusion: Protecting Your Investment for the Upcoming Season
Properly winterizing your inboard boat motor is the best way to protect your investment and ensure a hassle-free start to the next boating season. While it may seem like a lot of steps, this process safeguards all inboard boats from the harsh realities of winter, ensuring your marine engine is ready for adventure when the warm weather returns. Remember to always consult your specific engine manual for instructions tailored to your inboard motor.
Additional Resources
- Mobile Marine Service Near Me: How They Can Help You Maintain Your Boat
- Vibration Testing: A Comprehensive Guide for the Marine Industry
- Motor Vibration Testing: Understanding Its Importance in the Marine Industry
[CATEGORY_LINK]

