I’ve been wrenching on boats in South Florida for 15 years, and nothing makes a vessel pop like gleaming metal fittings. Last June, a client named Javier rolled into Dinner Key Marina with his 2021 Sea Ray 350, its railings looking like they’d been through a hurricane—dull, chalky, and speckled with rust. I grabbed my go-to marine metal restorer and polish, and in three hours, those fittings were sparkling like new. Cost him $150 in products and elbow grease, but he was grinning ear to ear. Here’s my masterclass on restoring your boat’s metal to a mirror finish, with pro tips to keep it shining through Miami’s salty air.
Table of Contents
Why Does Marine Metal Tarnish So Fast?
Saltwater and sun are brutal on boat fittings. I’ve seen brand-new stainless steel cleats turn hazy in months off Key Biscayne. It’s a chemical battle—chloride ions from salt speed up oxidation, turning shiny surfaces dull or rusty. UV rays don’t help; they cook the metal and break down protective coatings. Understanding this fight is key to picking the right polish and keeping your boat looking sharp.
What’s Oxidation Doing to Your Boat’s Metal?
Oxidation is like rust for marine metals—it’s the enemy. Salt spray dries, leaving chloride ions that eat away at surfaces, forming a dull haze or rust stains. Last summer, I helped a buddy, Sofia, at Bahia Mar with her Grady-White 208. Her bow rail had a chalky film from months of neglect. A quick test with a non-abrasive polish confirmed it was anodized aluminum—fixed it for $50. Knowing your metal type is half the battle.
What Types of Marine Metals Need Polishing?
Not all metals tarnish the same way. I’ve worked on everything from stainless steel to brass in Fort Lauderdale’s marinas, and each needs a specific approach.
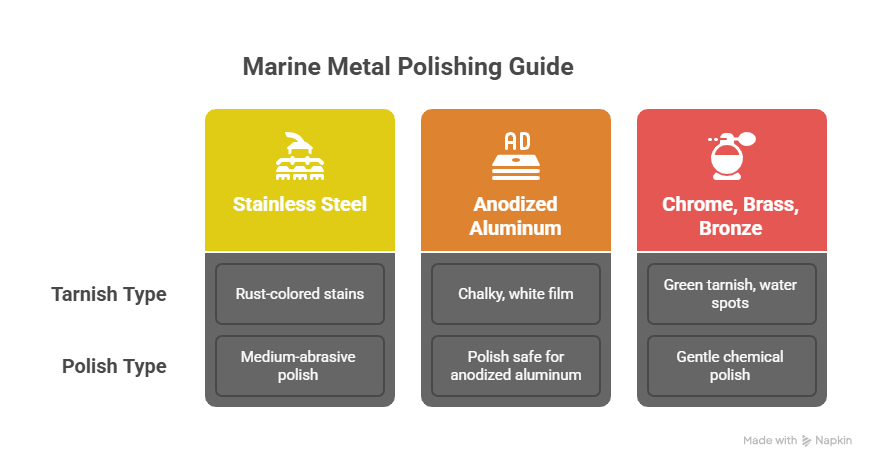
- Stainless Steel (316 Marine Grade): Tough but not immune. It gets rust-colored stains in tight spots, like around screws. I use a medium-abrasive polish to tackle those.
- Anodized Aluminum: Common on T-tops and towers, it develops a chalky, white film. Only use polishes labeled “safe for anodized aluminum” to avoid stripping the coating.
- Chrome, Brass, Bronze: These look amazing but form green tarnish or water spots. A gentle chemical polish works best to restore their glow.
Last month, a client at Coconut Grove had pitted aluminum railings on his Boston Whaler. I used a heavy-cutting compound, then a fine polish—took two hours, but it was mirror-like. Match your polish to the metal, or you’re asking for trouble.

How Do You Choose the Right Marine Metal Restorer and Polish?
Picking the right product is make-or-break. I learned this the hard way in 2012 when I scratched a client’s chrome trim with the wrong polish—cost me $200 to fix. Here’s how I choose now.
Abrasive vs. Chemical Polishes: What’s the Difference?
- Abrasive Polishes: These are like liquid sandpaper, grinding away oxidized metal. Great for heavy tarnish but risky on delicate surfaces. I use them on bare aluminum towers.
- Chemical Polishes: These dissolve tarnish without removing metal. Perfect for chrome or anodized aluminum. I keep a chemical polish in my truck for quick jobs at Stiltsville.
Paste, Liquid, or Wadding: Which Format Works Best?
- Paste: Stays put on vertical rails, less mess. I used a paste on Javier’s Sea Ray—worked like a charm.
- Liquid: Spreads fast on big surfaces, ideal for machine polishing. Shake it well to mix the grit.
- Wadding: Pre-soaked cotton for tight spots. I use it for cleats—saves time.
Quick Guide to Matching Polish to Metal
| Metal Type | Polish Type | Example Use Case |
|---|---|---|
| Stainless Steel | Medium-abrasive, then fine polish | Rust stains on cleats |
| Anodized Aluminum | Non-abrasive, labeled “safe” | Chalky T-top |
| Bare Aluminum | Heavy-cutting compound | Pitted railings |
| Chrome/Brass/Bronze | Chemical or fine non-abrasive | Tarnished trim |
This table’s from jobs I’ve done in Miami—keeps me from screwing up delicate finishes.
How Do You Restore Marine Metal to a Mirror Finish?
Here’s my step-by-step process, honed over years of trial and error. It’s not rocket science, but it takes patience to get that showroom shine.
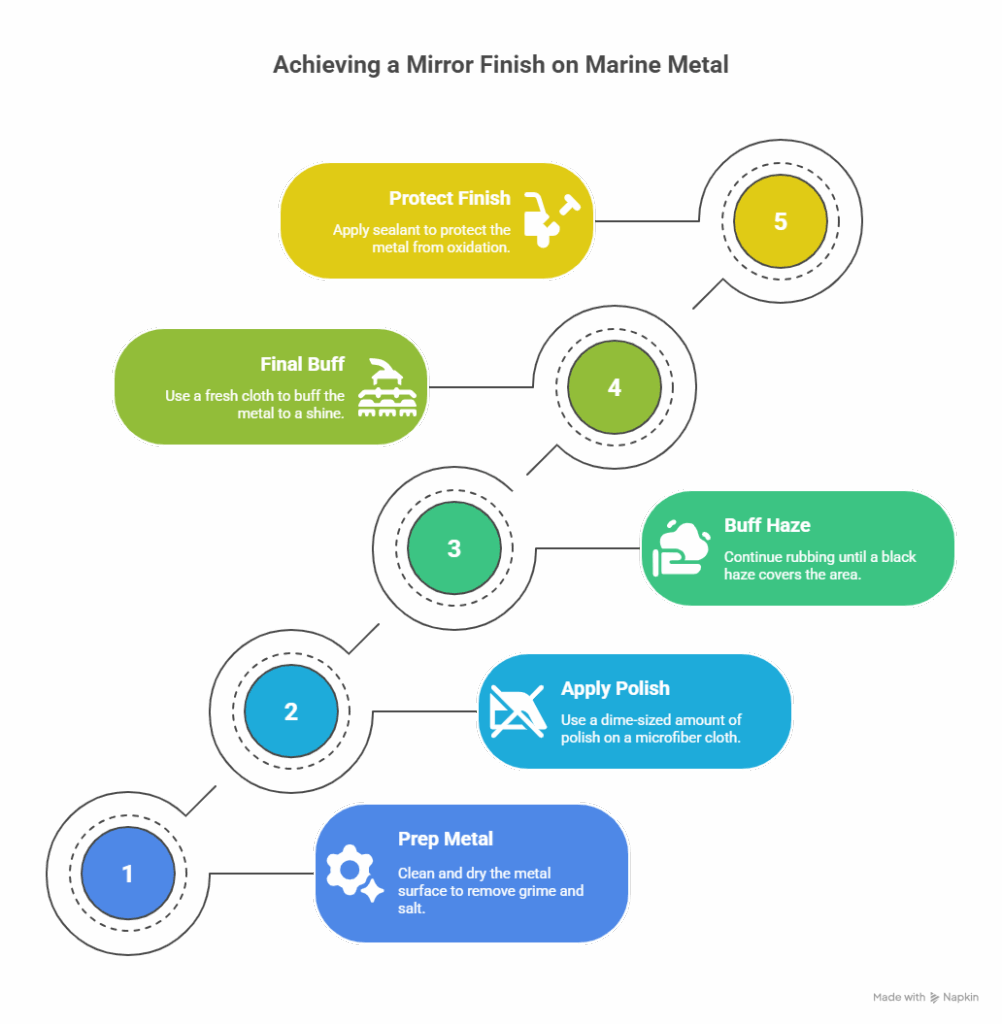
Step 1: Prep Like a Pro
You can’t polish over grime—it’s like painting a dirty wall. Last July, I worked on a client’s Bertram 31 at Key Biscayne. Its cleats were caked with salt. I washed them with boat soap and fresh water, then dried with a microfiber towel. Dry metal is non-negotiable—water spots mess up the finish.
Step 2: Apply the Polish
Use a dime-sized dab of polish on a microfiber cloth. Work in 2×2-foot sections to keep it manageable. I rub in circles and back-and-forth with firm pressure. On Sofia’s Grady-White, I used a chemical polish on the brass trim—took 10 minutes per section.
Step 3: Embrace the Black Haze
When a black haze forms, don’t freak out. That’s the polish lifting oxidation—proof it’s working. I saw this on Javier’s railings; kept rubbing until the haze covered the area. Tough spots might need a second pass with extra pressure.
Step 4: Buff to Shine
Grab a fresh microfiber cloth—reusing the dirty one’s a rookie mistake. Buff lightly and fast, flipping the cloth to avoid smearing. When I finished Javier’s Sea Ray, the railings gleamed like mirrors. That final buff is where the magic happens.

How Do You Handle Severe Oxidation?
Some metals are so bad they look unsalvageable. I’ve been there—pitted aluminum towers are the worst. Last spring, a client’s 2008 Boston Whaler at Coconut Grove was chalky as hell. Here’s how I tackled it.
Multi-Stage Polishing
- Cut: Use a heavy-cutting compound with a wool pad on a machine buffer. I wet-sanded the Boston Whaler’s tower with 1500-grit paper—took skill not to overdo it.
- Refine: Switch to a medium polish with a foam pad to smooth out scratches.
- Finish: End with a fine polish for that mirror gleam. Took me three hours, but it was worth it.
Test on a hidden spot first. I learned that after scratching a client’s T-top in 2014—embarrassing.
Machine vs. Hand Polishing
Hand polishing is fine for small jobs, like cleats. But for railings or towers? Get a machine buffer. I use an orbital buffer with a wool pad for heavy work, then a foam pad for finishing. Saves hours and gets a uniform shine. Just go slow—too much pressure can burn the metal.
How Do You Protect Surrounding Surfaces While Polishing?
Polish residue can stain gelcoat or vinyl. I learned this the hard way when black smudges ruined a client’s white deck at Stiltsville—took an hour to clean. Now, I tape off areas with painter’s tape and keep a marine detailer spray handy for quick wipe-downs. Prep saves headaches.
How Do You Lock in the Shine for Months?
Polishing’s only half the job. Bare metal starts oxidizing again fast in Miami’s humidity. I apply a sealant right after polishing to protect my work.
Wax vs. Sealant: What’s Better?
- Marine Wax: Gives a warm glow, easy to apply. Needs redoing every 1–3 months. I used carnauba wax on a client’s brass trim last month—looked amazing but faded by fall.
- Polymer/Ceramic Sealant: Bonds to the metal, lasts 6–12 months. I used a ceramic sealant on Javier’s railings—still shiny in October.
Maintenance to Avoid Big Jobs
Rinse metal with fresh water after every trip. I wipe down my Boston Whaler’s fittings with a microfiber towel—takes 10 minutes. A touch-up polish every 2–3 months keeps tarnish at bay. It’s way easier than a full restoration each season.
FAQ: Common Questions About Marine Metal Restorer and Polish
What’s the Best Marine Metal Restorer for Stainless Steel?
I use a medium-abrasive polish for rust stains, followed by a fine polish for shine. Last July, I fixed a client’s stainless cleats at Bahia Mar with this combo—cost $30. Check for “316 marine-grade safe” on the label.
Can I Use Regular Polish on Anodized Aluminum?
No way—regular polish strips the coating. Use a non-abrasive polish labeled “safe for anodized aluminum.” I learned this after ruining a T-top in 2013. Try a product like Flitz for safe results.
How Often Should I Polish My Boat’s Metal?
Every 6–12 months, depending on exposure. High-use areas like railings need it more. I polish my boat’s cleats twice a year—keeps them shiny for $20 in supplies. A sealant extends the time between jobs.
Why Does a Black Haze Appear When Polishing?
That’s oxidation being lifted—proof the polish is working. I saw it on Sofia’s Grady-White last summer. Keep rubbing until it forms, then buff with a clean cloth. It’s normal and means you’re on track.
Is Machine Polishing Worth It?
Absolutely. An orbital buffer saves hours on big surfaces like T-tops. I used one on a Boston Whaler’s tower—cut my time in half for $200 in tools. Start slow to avoid damage. Check out brands like Meguiar’s for reliable buffers.
How Do I Protect Polished Metal Long-Term?
Apply a polymer or ceramic sealant right after polishing. I used a ceramic sealant on a client’s Sea Ray in June—still gleaming three months later. A quick rinse after trips helps, too. Try 3M Marine Sealant for durability.
What Mistakes Should I Avoid When Polishing?
Don’t use the wrong polish or skip prep. I once polished over salt on a client’s rail—made a mess. Wash thoroughly, dry completely, and use a fresh cloth for buffing. Tape off gelcoat to avoid stains.
Why Your Boat Deserves a Flawless Shine
Polishing marine metal isn’t just about looks—it’s about pride. A gleaming rail or cleat reflects the care you put into your vessel. Match your polish to the metal, embrace the black haze, and seal it with a ceramic coating. I’ve seen boats go from dull to dazzling in a day, like Javier’s Sea Ray last summer. Inspect your fittings, grab the right products, and get to work. Your boat’s shine is worth it.
Author Bio
I’m Alex, a 15-year marine technician based in Miami, with ABYC certification since 2009. I’ve restored metal on 200+ boats, from Sea Rays to Boston Whalers, across South Florida’s marinas. My work’s been featured in local boating forums, and I’m passionate about keeping vessels looking sharp.


Leave a Reply