
Key Takeaways
Installing an inboard motor is a rewarding but demanding project where precision is everything. From the initial measurements to the final sea trial, every step builds upon the last. These key takeaways highlight the most critical actions you must get right for a safe, reliable, and smooth-running vessel.
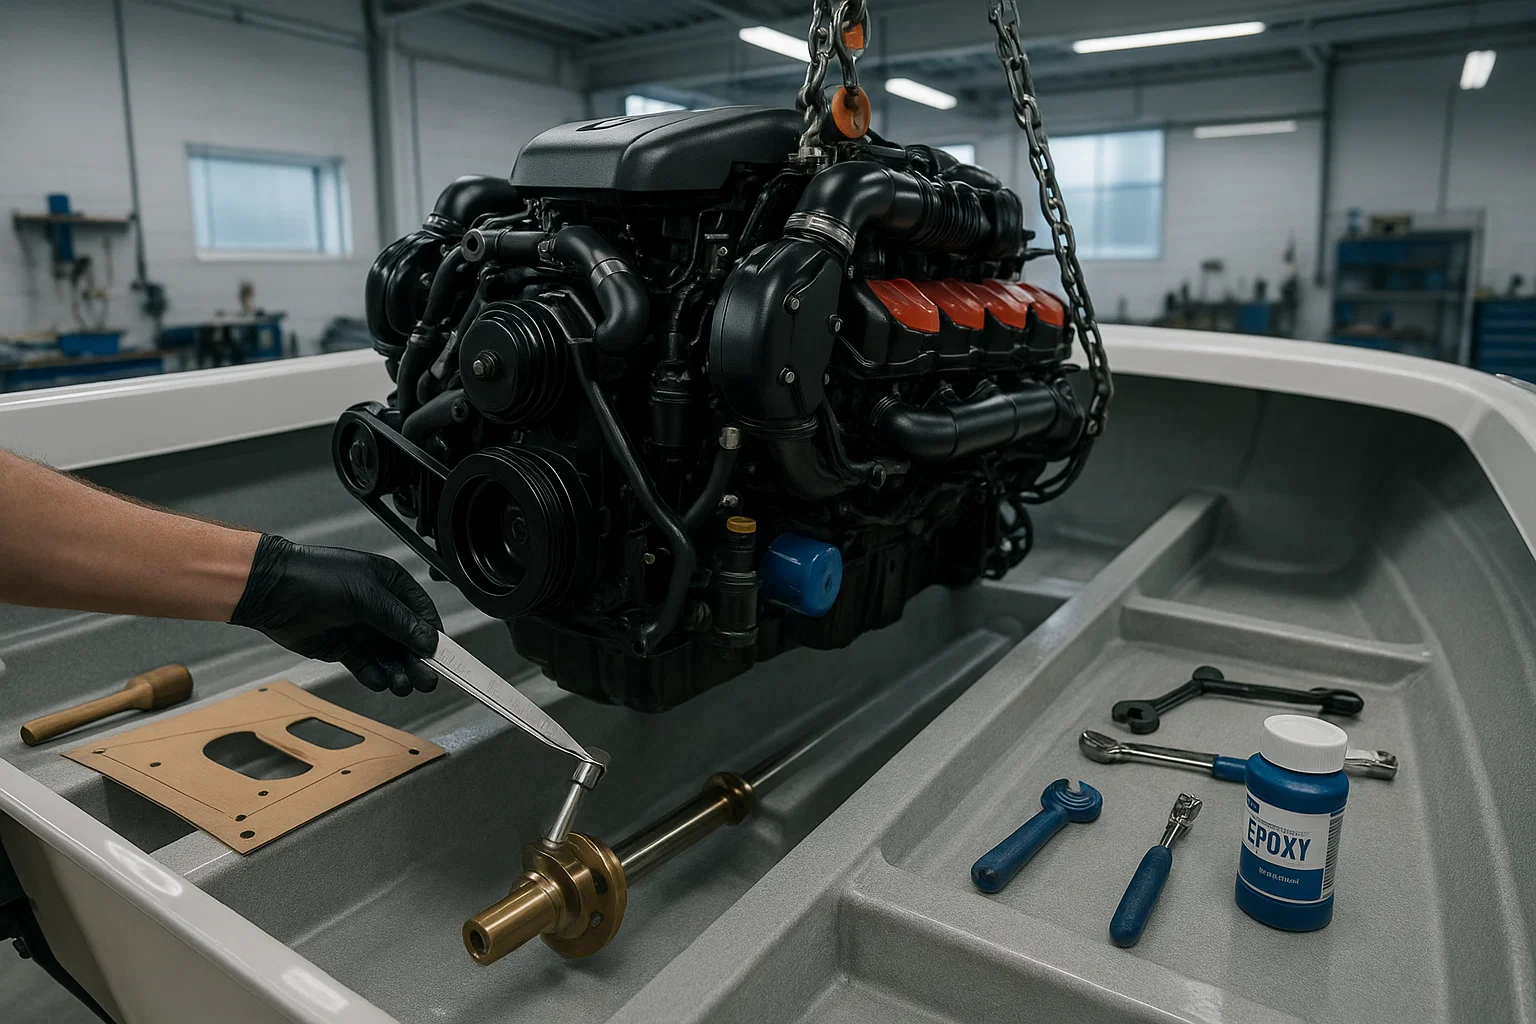
- Plan meticulously before you begin by creating a cardboard engine template to visualize clearances and ensure every component fits perfectly before you lift a single tool.
- Build a rock-solid foundation for your engine by bonding the bed to the hull with an epoxy mixture, creating a perfect, void-free fit that can handle intense vibration and thrust.
- Drill the shaft log hole with extreme care, starting with a pilot hole from the inside and sealing any cored hull material with solid epoxy to prevent water intrusion and crushing.
- Achieve perfect alignment using a feeler gauge to ensure the gap between shaft and transmission couplings is identical, targeting a professional tolerance of just 0.003 inches to prevent destructive vibration.
- Install critical safety systems like a fuel shut-off valve and a vented loop (anti-siphon valve) in the wet exhaust to prevent dangerous leaks and catastrophic engine flooding.
- Use only marine-grade components for all systems, including tinned electrical wire and USCG-approved fuel hose with double clamps on every connection to prevent corrosion and failure.
- Perform a dockside start-up test after launching to immediately check for leaks and adjust a traditional stuffing box so it drips slowly, which is essential to cool and lubricate the packing.
Master these core principles to ensure your hard work translates into countless hours of trouble-free enjoyment on the water.
Introduction
Installing an inboard motor is one of the most rewarding—and unforgiving—projects a boat owner can tackle. It’s a true test of skill that promises to transform your vessel with new power and reliability.
The difference between a smooth, powerful ride and a boat that vibrates itself apart comes down to meticulous preparation and a deep respect for the process. One small miscalculation in the planning phase can cascade into major problems on the water.
This guide isn’t just about dropping an engine onto its mounts. It’s a complete system integration that ensures safety, performance, and longevity.
We’ve broken down this complex job into a clear, step-by-step framework that covers everything you need for a successful installation:
- Meticulous planning and tool gathering
- Building a rock-solid engine foundation
- Installing the drivetrain and propeller shaft
- Achieving perfect engine alignment (down to the thousandth of an inch)
- Connecting all vital systems for reliable operation
Your journey from an empty hull to a purring engine starts not with a wrench, but with a plan. Get this first phase right, and you set the stage for every victory to come.
Phase 1: Meticulous Planning and Preparation
The success of your entire inboard motor installation hinges on what you do before you ever lift the engine. This initial phase prevents costly mistakes and ensures every component fits perfectly.
Rushing here is the number one cause of alignment issues, structural problems, and safety hazards down the line.
Assess Your Foundation: Hull and Workspace
Before buying a single bolt, give your boat a thorough inspection. A strong engine needs an equally strong foundation.
- Inspect the Hull: Clean the engine bay and bilge, then check for any signs of rot, delamination, or weakness in the stringers that will support the engine.
- Evaluate Reinforcement Needs: Are the existing engine beds strong enough for the new motor’s weight and torque? You may need to reinforce them with fresh fiberglass and epoxy.
- Prepare Your Workspace: Make sure your work area is clean, well-lit, and ventilated. Clear the boat’s interior for safe movement and easy access to the engine bay.
Gather Your Essential Arsenal
Having the right tools on hand makes the job smoother and safer. Don’t try to improvise, especially with lifting and alignment.
- Heavy Lifting: Secure an engine hoist or crane with more than enough capacity for your motor. Use proper slings or chains for a balanced lift.
- Specialized Tools & Materials:
- An engine alignment tool is non-negotiable for a vibration-free setup.
- Comprehensive wrench and socket sets (Metric and SAE).
- A torque wrench for tightening bolts to spec.
- High-quality marine-grade sealant (like 3M 5200).
- Stainless steel or bronze fasteners to prevent corrosion.
Blueprint Your Installation
Precise measurements are the blueprint for your entire project.
Picture this: create a simple cardboard template of your engine’s dimensions. Place it in the engine bay to visualize clearances with the hull, fuel tanks, and deck. This simple step can save you hours of frustration.
Remember to account for the engine’s maximum tilt and movement when underway. Calculating the correct propeller shaft angle is equally critical, as this determines the precise angle for mounting the engine itself.
Ultimately, this planning phase is the cheapest insurance you can buy for your project. Taking the time to measure, inspect, and prepare meticulously ensures the rest of your installation goes smoothly.
Phase 2: Building the Engine’s Foundation
The engine bed is the structural backbone of your installation. Think of it as the custom-built chassis for your motor—it must absorb powerful vibration and thrust while holding the engine in perfect, rigid alignment with the propeller shaft.
An engine is only as stable as the foundation it sits on. Rushing this phase is a direct path to performance issues and costly repairs later.
Choosing Your Materials and Design
The right material depends on your boat’s hull, your budget, and your fabrication skills. Each choice offers a different balance of strength, cost, and installation complexity.
- Wood: Classic materials like oak or mahogany are strong and workable. They must be fully encapsulated in fiberglass and epoxy to become waterproof and prevent rot.
- Fiberglass: Building up solid fiberglass stringers is common in modern boats. This method creates a powerful, seamless bond directly to a fiberglass hull.
- Metal: Custom-fabricated aluminum or steel beds offer exceptional strength and precision, but typically require professional welding and finishing.
The structural design usually consists of two longitudinal stringers that run parallel to the boat’s keel, sometimes connected with transverse supports to distribute the load.
Construction and Precise Installation
With your design finalized, you can begin fabrication. Carefully cut and shape the components of your engine bed according to your plans.
The most critical step is creating a perfect, void-free fit between the new bed and the hull. Use a thick mixture of epoxy and high-density filler to bond the components, ensuring there are no gaps that could create stress points. This creates a single, rock-solid structure.
Once the bed is secure, position and drill the holes for the adjustable motor mounts. These mounts are your key to success in the final alignment phase, allowing you to make micro-adjustments to the engine’s height and angle.
A well-built engine bed provides unwavering structural support and sets the stage for flawless drivetrain alignment. Get this foundation right, and every subsequent step becomes significantly more manageable.
Phase 3: Installing the Drivetrain Components
With your engine’s foundation in place, it’s time to install the components that transfer power directly to the water.
This phase is where the project gets real. Success here hinges on absolute precision, especially since it involves drilling a significant hole right through your hull.
Drilling the Critical Shaft Log Hole
This is the ultimate “measure twice, cut once” moment of your project. Using your layout plans, transfer the exact entry point and angle for the propeller shaft onto the hull. Double and triple-check this position.
This is a point of no return. Start with a small pilot hole from inside the boat, then check its exit point on the outside before committing to the full-sized hole saw.
If your hull is cored (with balsa or foam), you must dig out the core material around the freshly drilled hole and fill the void with solid epoxy and fiberglass. This critical step prevents water intrusion and stops the hull from crushing under compression.
Installing the Shaft Log and Seal
The shaft log (or stern tube) is the tube that houses the propeller shaft as it passes through the hull. Dry fit it first, then bed it securely in a high-quality, below-the-waterline marine sealant.
Next, install the seal that keeps the water out. You have two primary options:
- The Stuffing Box: A traditional and highly reliable method using packed, waxy rope to create a seal. It’s designed to drip very slowly for lubrication when the shaft is turning.
- Dripless Shaft Seal: A modern, low-maintenance alternative that uses a mechanical seal for a completely dry bilge. Installation can be more complex.
Attach the seal’s hose and clamps to the inboard end of the shaft log.
Fitting the Propeller Shaft and Propeller
Before the shaft goes in, press the cutless bearing into its strut on the outside of the hull. This bearing is what supports the propeller shaft externally.
Carefully slide the propeller shaft through the cutless bearing, the shaft log, and the stuffing box into the boat.
Fit the propeller onto the tapered, keyed end of the shaft. Tighten the prop nut to the manufacturer’s specification and secure it with a new cotter pin. After this, the shaft must still turn freely by hand. Any binding indicates an issue that must be fixed now, before the engine is installed.
With the drivetrain components in place, you’ve created the physical link between your engine and the water. This perfectly installed shaft is now the centerline for the final, critical step of aligning the engine itself.
Phase 4: Setting the Engine and Perfecting Alignment
This is the moment of truth. Lowering the engine into your boat is exciting, but the painstaking alignment that follows is the single most important step of the entire installation.
Getting this right is the difference between a smooth, powerful ride and a boat that vibrates itself apart. Patience here prevents costly damage down the line.
Hoisting the Engine into Place
Picture this: your new engine is balanced and hanging from the hoist, ready for its new home. This is a job for two people.
With your helper guiding it, carefully lower the engine over the motor mounts you installed earlier. Let it settle gently onto the mounts.
Loosely thread the nuts onto the mounting bolts. You need the engine to be secure but still able to shift for the alignment process. Do not tighten them yet.
The Critical Alignment Process
Engine alignment isn’t about what looks right; it’s about what the tools tell you. The goal is to make the engine’s transmission coupling and the propeller shaft coupling perfectly parallel and centered.
Your feeler gauge is the ultimate source of truth here.
- Bring the Couplings Together: Slide the propeller shaft forward so its coupling face meets the transmission coupling face. They should be nearly touching.
- Measure the Gap: Use a feeler gauge to measure the space between the two faces at four points: top, bottom, left, and right.
- Adjust and Re-Measure: Use the adjustable engine mounts to move the engine up, down, left, or right until the gap is identical all the way around. A professional target is a tolerance of just 0.003 inches.
- Rotate and Repeat: Once the gap is even, rotate the propeller shaft 90 degrees and measure again. Repeat this for a full 360-degree rotation to ensure perfect alignment through the entire circle.
Finalizing and Securing the Mounts
Once you’ve achieved perfect, consistent alignment, it’s time to lock it in.
Tighten the engine mount retaining nuts to the manufacturer’s recommended torque. It’s crucial to tighten them in an even, alternating pattern to avoid pulling the engine out of alignment.
After everything is tight, do one last check with the feeler gauge. Tightening can sometimes cause slight shifts, so you must re-check the alignment to confirm nothing has moved.
This meticulous process ensures that the power from your engine flows directly to the propeller shaft without creating destructive vibration, noise, or wear on your drivetrain components.
Phase 5: Connecting All Ancillary Systems
Your engine is bolted down and perfectly aligned. Now it’s time to breathe life into it by connecting the vital systems that deliver fuel, expel exhaust, and keep everything cool.
This is where the project transforms from a mechanical puzzle into a functioning power plant. Precision here is just as critical as it was during alignment.
Fuel System Installation
A clean, reliable fuel supply is the lifeblood of your engine. Any contamination or air leak introduced here will cause frustrating performance issues down the road.
- Tank and Lines: Start with a spotless fuel tank. Run marine-grade (USCG Type A1-15) fuel hose from the tank to the engine, avoiding any sharp bends or kinks that could restrict flow.
- Filters and Safety: Install a primary fuel filter/water separator in an accessible location between the tank and the engine. A fuel shut-off valve near the tank is an absolute safety must-have.
- Secure Connections: Use two high-quality stainless steel hose clamps on every fuel connection. This redundancy isn’t overkill; it’s essential insurance against leaks.
Exhaust System Setup
Managing hot, toxic exhaust gas on a boat requires a specialized wet exhaust system. This system uses raw water to cool the gases, making them safe to discharge through a fiberglass or plastic hull.
Picture this: raw water is injected into the exhaust, instantly cooling it from several hundred degrees to a much safer temperature.
The design must include a vented loop (anti-siphon valve) if the engine’s injection point is near or below the boat’s waterline. Without it, water can siphon back through the exhaust and flood your engine, causing catastrophic damage.
Electrical and Cooling Connections
The final hookups bring your control and cooling systems online.
- Engine Wiring: Connect the battery cables to the starter and a solid engine ground point. Following the manufacturer’s diagram, wire the control panel and ignition using only marine-grade tinned wire, which resists corrosion in the damp marine environment.
- Raw Water Cooling: Connect the raw water intake (the seacock) to the engine’s raw water pump. Again, secure all hose connections with double clamps to prevent leaks that could sink your boat.
With these systems connected, you’re no longer looking at a static engine block. You have a fully integrated marine power system, ready for final checks and its first taste of the water.
Phase 6: Final Checks, Adjustments, and Sea Trial
The heavy lifting is done. This final phase transforms your project from a collection of parts into a reliable vessel, ensuring all your hard work pays off on the open water.
This is your last chance to catch any issues on dry land or at the dock, where fixes are infinitely easier.
Pre-Launch System Check
Before the boat even touches the water, run through this meticulous checklist. Think of it as the final inspection before a pilot takes off—every detail matters.
- Top Off Fluids: Double-check the engine oil and transmission fluid levels, filling them to the manufacturer’s recommended line.
- Inspect All Connections: Get a wrench and a flashlight. Systematically check every single fuel, water, and exhaust connection for tightness. A loose clamp here can become a major leak underway.
- Review Belt Tension: Press down on the alternator and raw water pump belts. They should have just a little bit of give, but not feel loose.
Dockside Start-Up and Adjustment
Once the boat is in the water, the real testing begins. Your goal here is to identify problems before you even cast off the lines.
Start the engine and let it run at idle for several minutes. Now, use your senses: look, listen, and smell for anything out of the ordinary. Immediately check for any sign of water, fuel, or exhaust leaks in the engine bay.
This is also the time to fine-tune the stuffing box. With the shaft turning, tighten the packing nut until you see a slow, steady drip—about one drop every 15-30 seconds. That drip is intentional; it’s what cools and lubricates the shaft packing. No drip means it will overheat.
The Sea Trial: Putting it All to the Test
Now for the moment of truth. Head out into open water, away from traffic.
Slowly and smoothly bring the engine up to cruising RPM, avoiding any sudden throttle changes. Your job is to be a human diagnostic tool.
- Monitor the Gauges: Keep your eyes glued to the engine temperature, oil pressure, and voltage. Are they stable and within the normal range?
- Feel for Vibrations: Pay attention to the feel of the hull beneath your feet. Any new or excessive vibration could signal a lingering alignment issue that needs to be addressed immediately.
- Listen to the Engine: Does it sound smooth and confident as it takes on a load?
After returning to the dock, perform one last, thorough inspection of the engine bay. Look for any new drips or loose fittings that may have appeared under load.
A successful sea trial isn’t the end of the project—it’s the beginning of your reward. Your diligence here ensures you can trust your work when you’re miles from shore, turning a complex installation into countless hours of reliable enjoyment.

Conclusion
Installing your own inboard motor is more than just a mechanical project; it’s a testament to your skill, patience, and dedication. You’ve transformed a complex collection of parts into the reliable heart of your vessel, ready to power countless adventures.
The true success of this installation isn’t just a running engine—it’s the confidence you gain from knowing every component was set with precision and care.
Your Core Principles for Success
- Plan Before You Lift: The success of your project is determined long before the engine enters the boat. Meticulous measurement, hull preparation, and tool gathering are your cheapest insurance.
- Alignment is Everything: Perfect engine alignment isn’t a suggestion; it’s the absolute key to a smooth, vibration-free, and long-lasting drivetrain. Your feeler gauge is the ultimate source of truth.
- Systems Integrity is Non-Negotiable: Use only marine-grade materials and double-clamp every fuel and water hose. Your safety on the water depends on the integrity of these vital systems.
- Trust, But Verify: The sea trial is your final, most important diagnostic test. Use your eyes, ears, and feel for the boat to confirm that everything is performing perfectly under load.
Your Immediate Next Steps
Your journey begins now, not when the engine arrives. Grab a flashlight and a notepad. Your very next move is a thorough inspection of your hull and engine stringers.
Follow that up by creating the cardboard engine template mentioned in Phase 1. This simple visualization will save you hours of guesswork and prevent costly mistakes down the line.
The meticulous work is what separates a frustrating project from a rewarding one. The greasy hands and painstaking adjustments have all led to this moment.
Turn the key, cast off the lines, and trust in the power you built with your own two hands. The open water is your reward.
Leave a Reply