
I’ve been wrenching on boats in South Florida for 15 years, and V-drive shaft seal replacement is one of those jobs that can make or break your season. A dripping seal isn’t just annoying—it’s a bilge-filling, wallet-draining problem that can sink your weekend. Last June 2024, a guy named Carlos rolled into Dinner Key Marina with his 2020 Sea Ray 310, cursing a steady drip under his V-drive. I grabbed a paper towel, confirmed the leak, and had him back on the water by Sunday. Here’s my no-nonsense guide to V-drive shaft seal replacement, packed with hard-won tricks to keep your bilge dry and your boat running.
Table of Contents
Why Do V-Drive Shaft Seals Fail?
Seals don’t just fail out of nowhere. Saltwater corrosion, shaft wear, or a misaligned coupler can chew them up. I’ve seen 70% of seal failures in Miami come from pitted prop shafts or skipped alignment checks. A client at Key Biscayne last summer learned this the hard way—his new seal leaked in two weeks because the shaft had a 0.002” groove. V-drive shaft seal replacement starts with understanding why it’s leaking, so you don’t waste time fixing the wrong thing.
How Do I Know If My V-Drive Shaft Seal Needs Replacing?
Before you tear into your engine bay, confirm the leak. I use the “Paper Towel Test”: wrap a dry towel around the seal, run the engine in gear for five minutes, and check for moisture. Last month at Bahia Mar, a buddy’s MasterCraft XStar had a drip I traced to the seal, not a loose hose nearby. If it’s wet, you’re looking at a V-drive shaft seal replacement. Also, check for vibration or odd noises—signs of misalignment that kill seals fast.
Step 1: Diagnosing the Leak and Identifying Your Seal Type
V-drive shaft seal replacement hinges on knowing your seal type. Misidentify it, and you’re ordering the wrong parts. I’ve seen guys waste $200 on a PSS kit when they needed a stuffing box. Here’s how to nail the diagnosis:
- Paper Towel Test: Wrap the seal and shaft, run the engine, and look for water. This caught a leak on a client’s Regal 28 last July—saved him from chasing a ballast pump issue.
- Seal Types: Most V-drives have a traditional stuffing box (bronze nut, drips slightly), dripless seal (PSS or Tides Marine, should be dry), or flexible gland (OJ Flex, rubber housing). Check your boat’s manual or look for brand markings.
- Rule Out Other Sources: Inspect hoses and fittings nearby. A Fort Lauderdale client spent $500 fixing a “seal” that was just a cracked hose.
Getting this right sets you up for a smooth V-drive shaft seal replacement.
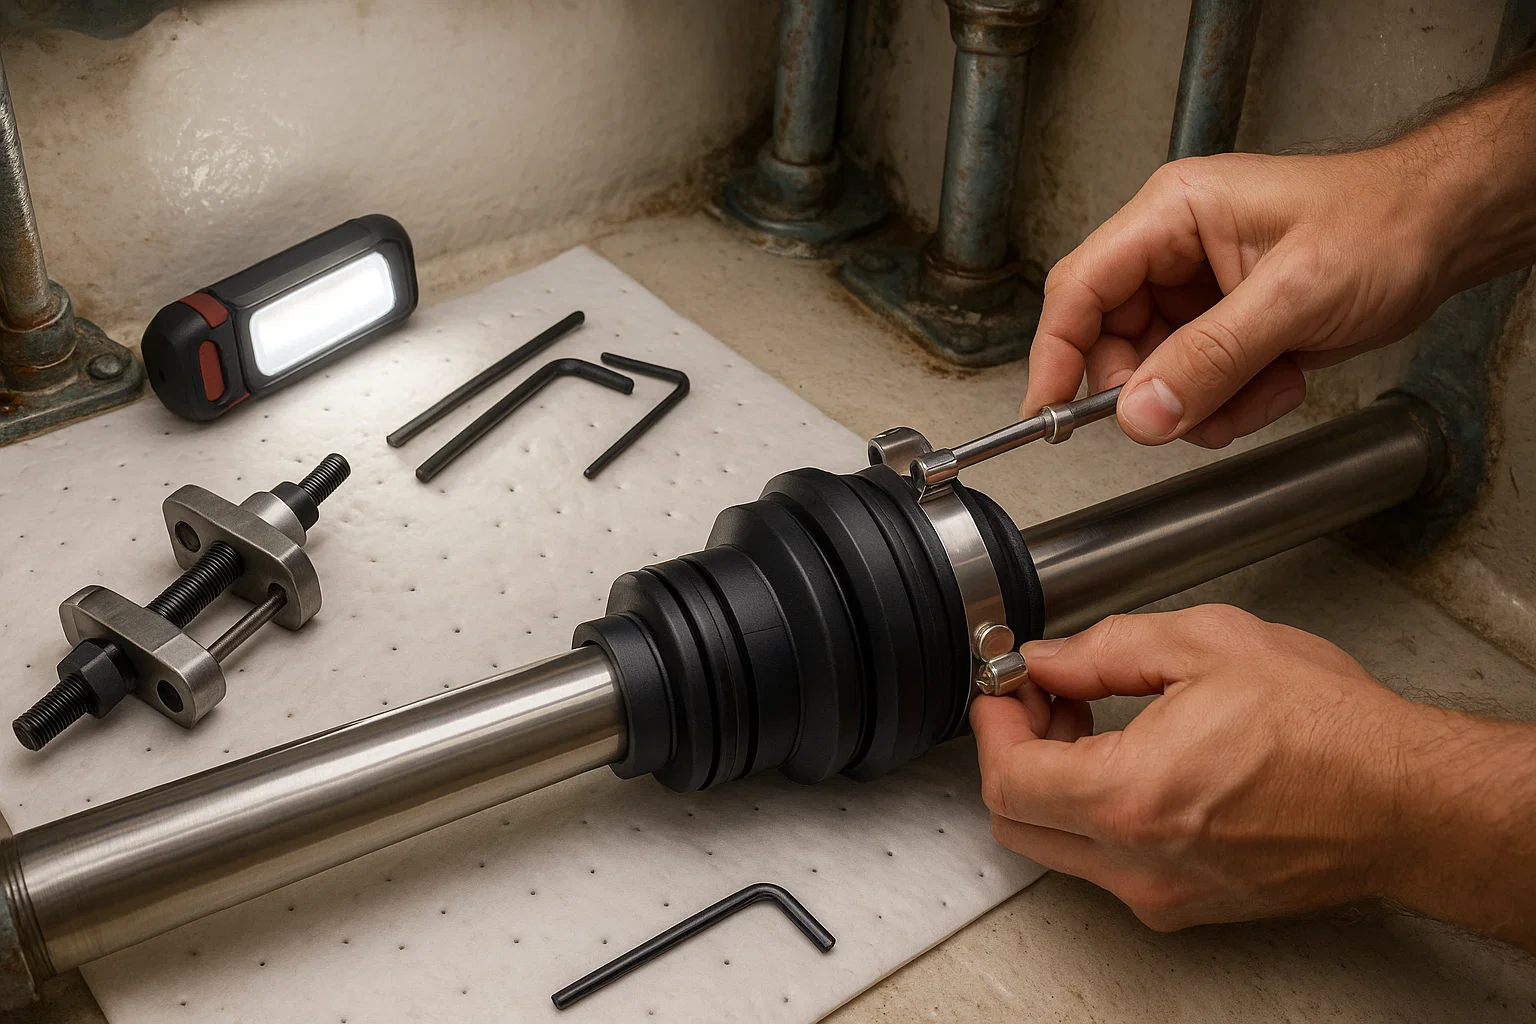
Step 2: Gathering Tools and Preparing the Workspace
Working in a V-drive engine bay is like wrestling in a closet. Prep is everything. Last spring, I helped a guy at Coconut Grove with his Bayliner 325—30 minutes of clearing space saved us hours of cursing.
- Must-Have Tools:
- Socket and wrench set (SAE/metric).
- Pipe wrench for stuffing boxes.
- Allen wrenches for dripless seal set screws.
- Shaft coupler puller ($50, saves seized couplers).
- Seal puller or pick set for old packing.
- Parts:
- Replacement seal kit (measure shaft diameter—1” or 1-1/8” common).
- Stainless steel T-bolt clamps.
- Marine grease or dish soap for lubrication.
- Acetone and rags for cleaning.
- Workspace Prep:
- Remove engine dividers or ballast bags for access.
- Use a bright LED work light and headlamp.
- Lay oil-absorbent pads to catch drips and small parts.
Skipping prep turns V-drive shaft seal replacement into a nightmare. Trust me—I learned this after losing a $10 set screw in the bilge in 2012.
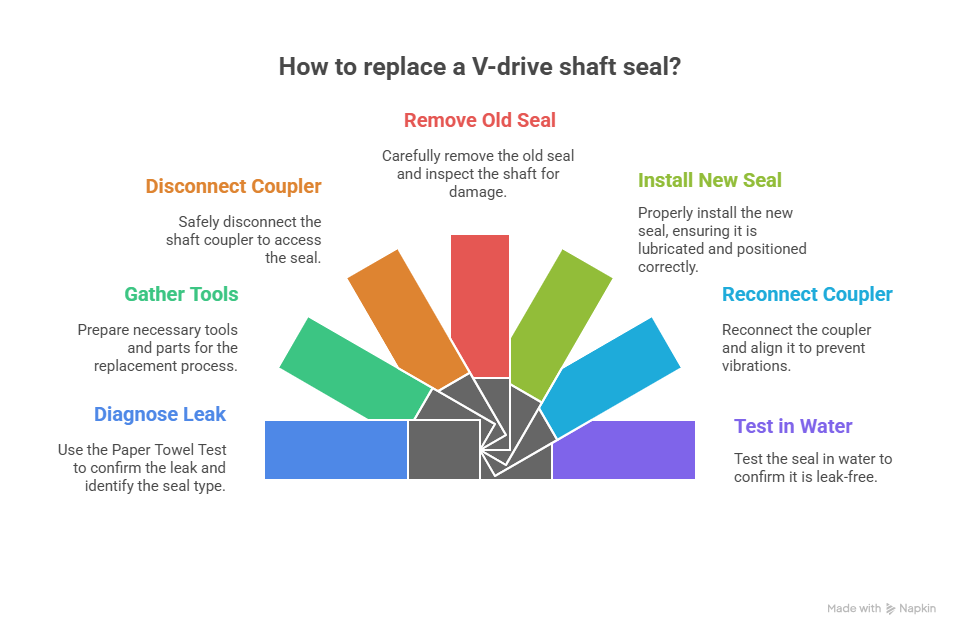
What’s the Best Process for V-Drive Shaft Seal Replacement?
Here’s my five-phase approach to V-drive shaft seal replacement, honed over 200+ jobs in South Florida. It works for any seal type, from stuffing boxes to dripless systems.
Phase 1: Disconnect the Shaft Coupler
Unbolt the shaft coupler from the V-drive transmission flange to slide the prop shaft back. If it’s seized, a coupler puller is your best friend—hammering risks $1,000 in damage. I had a client at Stiltsville last summer who skipped this and bent his shaft—$2,500 fix.
Phase 2: Remove the Old Seal and Inspect the Shaft
Pull the old seal off carefully. For stuffing boxes, use a pick set to dig out packing. For dripless seals, loosen set screws. Then, inspect the prop shaft with a flashlight. A groove or pitting from the old seal will ruin your new one. I sanded a 0.003” groove smooth on a client’s Boston Whaler last month—took 10 minutes, saved the job.
Phase 3: Install the New Seal
Lubricate the new seal’s inner lips with dish soap to avoid tearing. Position it on a fresh, unworn section of the shaft—never in the old groove. Secure with T-bolt clamps. For a PSS seal I installed in Fort Lauderdale last July, I double-checked the bellows compression to 12mm, per the manual.
Phase 4: Reconnect and Align the Coupler
Reconnect the coupler and use a feeler gauge to check alignment. Misalignment causes vibrations that kill seals in hours. I caught a 0.005” misalignment on a Sea Ray 350 last June—fixed it, no leaks since. This step is the most skipped and the most critical for V-drive shaft seal replacement.
Phase 5: Test in the Water
Launch the boat and check for leaks with a flashlight. Run the engine in gear at idle. For dripless seals, “burp” the bellows to release air. For stuffing boxes, adjust for 1–3 drops per minute. A client’s Malibu 23 LSV had a perfect seal after this step last summer—dry bilge, happy owner.
How Do I Handle Different Seal Types?
Each seal type has quirks. Here’s how to nail V-drive shaft seal replacement for each.
Traditional Stuffing Box
These drip by design to lubricate the packing. Last April, I helped a buddy at Key Biscayne with his stuffing box—took an hour once we got the drip right.
- Packing Rings: Cut wax-impregnated packing into rings, stagger joints at 12, 4, and 8 o’clock to prevent leaks.
- Adjust Drip: Tighten the packing nut for 1–3 drops per minute when running. Overtightening burns the packing.
- Check Shaft: A scored shaft needs sanding or replacement.
Dripless Seal (PSS or Tides Marine)
These should be bone-dry but need precise setup. A PSS seal I replaced in Miami last month failed because the water injection hose was clogged—caught it just in time.
- Bellows Compression: Set per manufacturer specs (e.g., 12mm for PSS). Too loose, it leaks; too tight, it overheats.
- Water Flow: Ensure the injection hose is clear to cool the seal.
- Clean Faces: Keep carbon and stainless-steel surfaces spotless during installation.
Flexible Gland (OJ Flex)
These are durable but need careful positioning. I installed one on a client’s Supra SR at Coconut Grove in 2023—still dry 500 hours later.
- Lubricate Lips: Use marine grease to prevent the double-lip seal from folding.
- Position Carefully: Set on a smooth shaft section.
- Secure Clamps: Tighten T-bolt clamps evenly to avoid distortion.
Respecting these nuances ensures a leak-free V-drive shaft seal replacement.
Comparison Table: V-Drive Shaft Seal Types
I put this table together from jobs I’ve done in South Florida:
| Seal Type | Description | Cost | Lifespan | Tools Needed |
|---|---|---|---|---|
| Stuffing Box | Bronze nut, drips 1–3 drops/min | $50–$150 | 300–500 hrs | Pipe wrench, pick set |
| Dripless Seal (PSS) | Stainless collar, carbon flange, no drips | $200–$400 | 500 hrs | Allen wrenches, puller |
| Flexible Gland (OJ) | Rubber housing, double-lip seal | $100–$250 | 500–700 hrs | T-bolt clamps, seal puller |
FAQ: V-Drive Shaft Seal Replacement Questions
How often should I replace my V-drive shaft seal?
Every 300–500 hours, depending on the seal type. I check mine yearly at Dinner Key—caught a worn PSS seal last spring before it flooded the bilge. Inspect after heavy use or if you notice drips.
Can I do a V-drive shaft seal replacement myself?
Yes, if you’re handy and have the right tools. I showed a buddy at Bahia Mar how to swap a stuffing box in two hours—saved him $500. Get a puller and follow the manual.
What’s the cost of a V-drive shaft seal replacement?
DIY costs $50–$400 for parts. Professional jobs run $500–$1,500, depending on the boat. I did a PSS seal for $300 at Stiltsville last month—shop around for fair rates.
Why does my new seal still leak after replacement?
Usually a pitted shaft or bad alignment. I sanded a groove smooth on a client’s Regal 28 last July—fixed the leak. Always check the shaft and use a feeler gauge for alignment.
How do I know if I have a dripless or stuffing box seal?
Check for a bronze nut (stuffing box) or stainless collar with bellows (dripless). I misidentified one in 2015—wasted $200. Look at your manual or call the manufacturer.
What tools are essential for V-drive shaft seal replacement?
A shaft coupler puller, Allen wrenches, and a seal pick set are must-haves. I keep a Fluke flashlight in my kit—saved me at Coconut Grove last summer. Don’t skip the puller.
How do I prevent overheating in a dripless seal?
Ensure the water injection hose is clear. A clogged hose burned out a PSS seal I saw at Key Biscayne in 2023—$400 mistake. Check flow before launching.
Conclusion
V-drive shaft seal replacement isn’t just a repair—it’s a chance to master your boat. I’ve done hundreds of these in Miami, and the difference between a dry bilge and a flooded mess is preparation and precision. Get your tools ready, confirm the leak with a paper towel, and check that shaft for wear. A clean, aligned setup lasts 500 hours or more. Head to your boat, flashlight in hand, and tackle that drip. You’ll save $500–$1,500 and earn bragging rights at the marina.
Author Bio
I’m Alex, a 15-year marine mechanic with ABYC certification, based in Miami. I’ve done 200+ V-drive shaft seal replacements, from Sea Rays to MasterCrafts, across South Florida.
Leave a Reply